
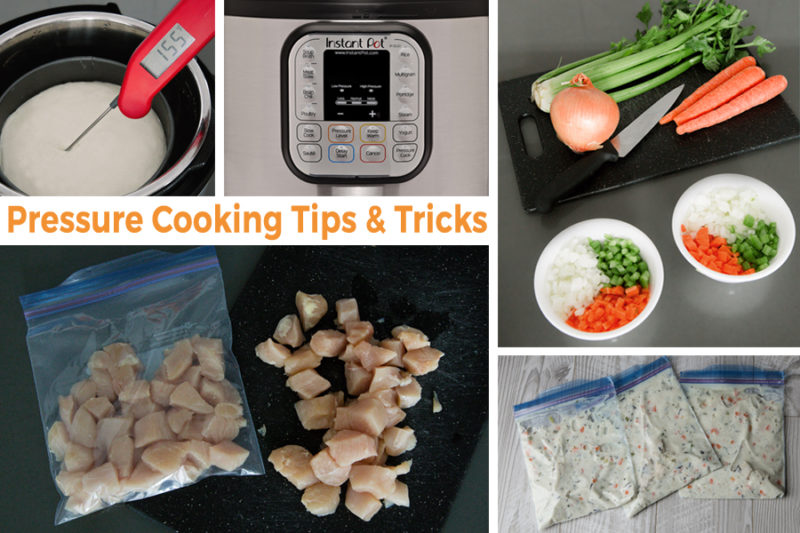
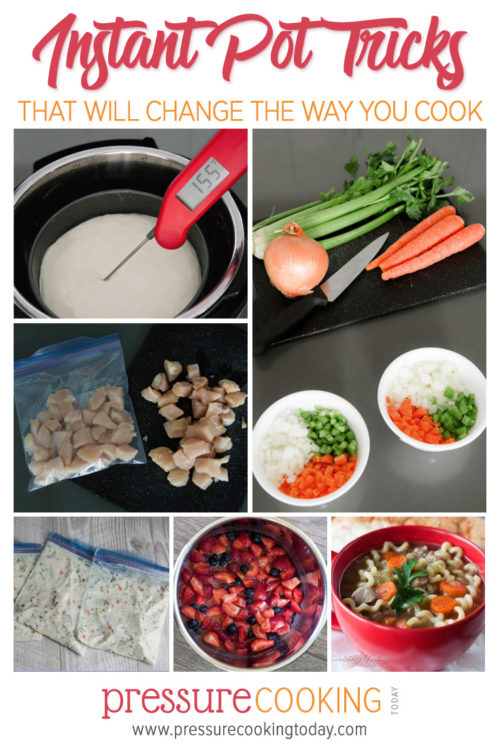
34 Pressure Cooking Tricks that Will Change the Way You Cook
Chances are, one of the things you love most about your Instant Pot or electric pressure cooker is all the time it saves you in the kitchen. But are you getting everything you could out of it? Try some of these Instant Pot hacks/pressure cooking tricks to help save even more time!
Jenn here again. Growing up, cooking was a chore that I avoided as often as possible. (Sorry, Mom!) But now that I’m cooking dinners for my own family, sharing a kitchen with Mom is a revelation!
I’m lucky enough to live close enough to Barbara that we have a standing lunch date every week. Quite often, she’ll pull out the pressure cooker and we’ll cook in the kitchen together. As she runs through the recipe, I’ll stop her and ask her to explain the different things she does and her reasoning behind them. She does these things without thinking, but I almost always go home having learned something new.
So this week, I thought I’d share some of the tricks I’ve learned from Barbara with all of you! And I’d love to hear from you—what things do you do to make life easier in the kitchen?
Pressure Cooking Tricks: Plan Ahead
Barbara’s #1 tip is to read the entire recipe before you start cooking. Growing up, we heard this a million times! But as an adult I realize it’s SUCH good advice. It only takes a minute or two, but it makes a huge difference in your stress level in cooking. You better understand the recipe timing and can make sure you have ingredients on hand. (It’s so frustrating when you have to pause in the middle of cooking because you’re out of essential ingredients.) It also lets you know what ingredients you need to have prepared and measured in advance.
Plan your meals each week so that you double up on common items. For example, make a double batch of white rice to eat with Pressure Cooker Beef and Broccoli and then save half of the cooked rice to make Ham Fried Rice (page 256 in the Electric Pressure Cooker Cookbook) later in the week.
Prep your ingredients the night before. For example, with Pumpkin Steel Cut Oats, the night before I’ll measure out all the dry ingredients and liquid ingredients in two separate containers and store in the fridge. I’ll get my pressure cooker out and ready to go with my breakfast ring on the night before. In the morning, I’ll saute the oats, dump in the pre-measured ingredients, and then go get ready for the day. By the time I’m done, breakfast is hot and ready and wonderful. (You can do this on a meal-by-meal basis or you can use dried fruits to prepare several batches at a time like Marci does with her ready-mix steel cut oats.)
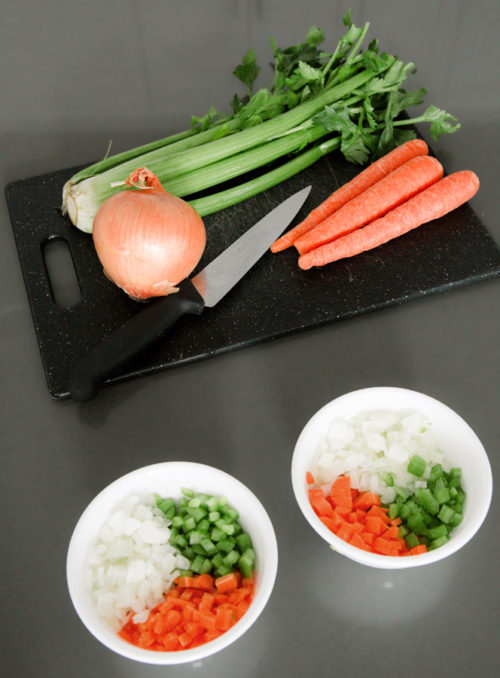
Plan multiple meals that use the same vegetables and then chop all the vegetables you’ll need for the next few days. Store the different amounts of vegetables in separate containers. For example, Pressure Cooker Chicken Noodle Soup and Pressure Cooker Rice Pilaf both use carrots, celery, and onions that are diced to the same size. So when I’m dicing the veggies for one meal, I’ll prep enough to make both meals and then store in the fridge until needed. (If you’re using chopped onion, I’ve found that glass containers with tight-fitting lids work best at keeping the onion smell from taking over the fridge.
Pressure Cooking Tricks: While Cooking
Meats
If you’re in a hurry, brown only one side of your meat. The meat will still have an appetizing color and the sauce will still get the great browning flavor, but you’ll be out of the kitchen in half the time.
If you bought meat in bulk to freeze for later, cut the meat into bite-size pieces and freeze them flat. Bite-size pieces of meat thaw quickly and you can use them frozen, without changing the recipe timing. I really love doing this with chicken meals that I make all the time, including Pressure Cooker Orange Chicken, Creamy Chicken and Wild Rice Soup, and Creamy Chicken Pesto Pasta (page 163), and Chicken Tetrazzini (page 164).

I love using boneless, skinless chicken thighs when pressure cooking. Not only are they less expensive than breasts, they pack more chicken flavor and cook up great in the pressure cooker. When using chicken thighs, don’t worry about trimming all the fat—just what you can cut away quickly. During pressure cooking, the rest of the fat will melt away from the chicken, leaving tender, juicy meat. (Try chicken thighs in Pressure Cooker Thai Chicken Thighs, Indian Butter Chicken (Tikka Masala), or Chicken Bacon Penne Pasta.)
Use an instant-read thermometer to verify each chicken breast is at least 165°F in the thickest part of the breast after cooking.
In a pinch, you can use shredded rotisserie chicken in recipes that call for cooked diced chicken like Quick White Chicken Chili or Butternut Squash Soup with Chicken and Orzo. Bonus: Save the bones to make an easy chicken stock.
Forgot to thaw that package of frozen ground beef or ground chicken before cooking? It’s actually really easy to cook from frozen in your Instant Pot or other electric pressure cooker!
- Skip the browning—frozen meat doesn’t brown well, so why spend the time?
- Just add 1 cup water to the pressure cooking pot along with the frozen-flat ground beef and any desired spices. Select High Pressure and 5 minutes cook time. When the cook time ends, use a quick pressure release.
- Select Saute and cook, stirring frequently, until the water evaporates and the meat is browned and crumbled.
- (This method assumes that your beef was frozen flat—if it is frozen in a thick slab or ball, you’ll need to add more High Pressure cook time.)
- Bonus: You can also use the trivet method to cook ground meat from frozen. While I first encountered this idea in the Instant Pot Community, my favorite write-up of this process comes from A Mind Full Mom.
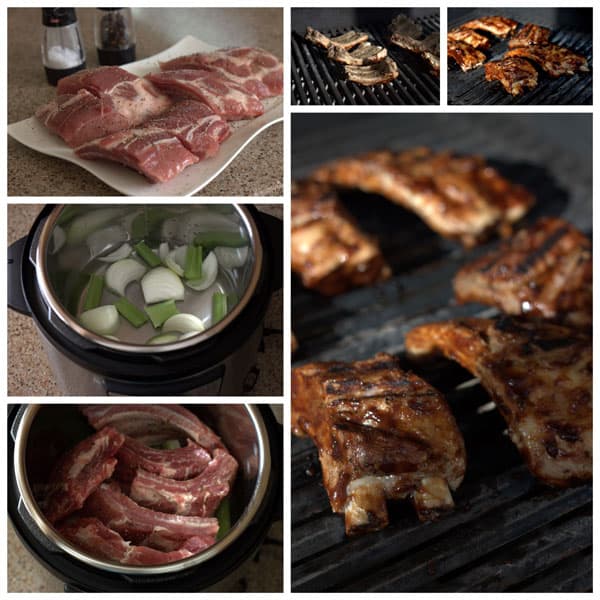
Combine pressure cooking and grilling to lock moisture into the meats without sacrificing the carmelized finish. By using two methods, you can pressure cook your meats early in the day and refrigerate until ready to grill. Then at night, slather on the barbecue sauce and finish cooking the meats on the grill. I use this method all the time with Baby Back Ribs and Barbecue Chicken Legs (page 131).
If you’re cooking a fatty meat like Bone-In Beef Short Ribs, cook them the day before you want to serve them and chill them overnight. Just before serving, remove the layer of fat that has accumulated on top and then reheat in your pressure cooker.
Pat the meat dry with a paper towel before browning to remove any extra moisture. (This will allow the meat to brown and not steam.) Be sure the cooking pot is hot before browning, then add the oil or butter and the meat. Once you’ve added the meat, don’t try to pick it up or move it around; wait until it releases easily from the bottom of the cooking pot before turning. Also, remember that browning happens best in a stainless steel pan—nonstick-coated pans (think Teflon) just don’t brown meat as well. Ceramic coated pans do a fairly good job.
Soups
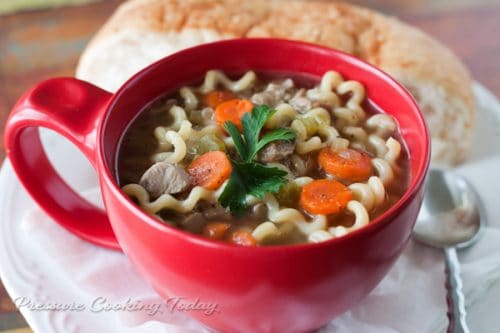
Cook the pasta or rice separate from the soup itself if you’re making enough for leftovers. Freeze the soup and pasta in separate small portions. Keeping them separate when frozen helps the pasta or rice not be as soggy when reheated.
When making soups, you don’t have to add all the broth before pressure cooking. The more liquids you add, the longer it takes the soup to come to pressure. Therefore, add half or even a third of the broth when pressure cooking—as long as you’re above your minimum liquid requirements for your pressure cooker, you’re good to go. This will speed up the process and keep ingredients from getting overcooked. (See this in action in Pressure Cooker Zuppa Toscana.)
If you’re cooking recipes like thick stew or chili or making fatty or oily foods for stock, do not use a quick release! Just like boiling water in the microwave, there are instances where foods inside the pressure cooker can be superheated. Give the pot a shake before opening to break any surface tension of the liquids inside and to prevent foods spitting once the lid is opened.
Unless otherwise specified in the recipe, allow the pressure to release naturally for at least 5 minutes. Doing this allows the liquid inside the pot to stop boiling so that the liquid doesn’t bubble out of the pressure cooking valve when you use a quick pressure release to release any remaining pressure.
Pasta & Rice
Use one brand of rice and pasta. The brand and type of pasta you are using makes a difference—some brands foam more than others. If you stick with the same brand you’ll be able to determine how much it foams and can reduce the pressure cook time and use a longer natural release time if necessary to avoid foaming.
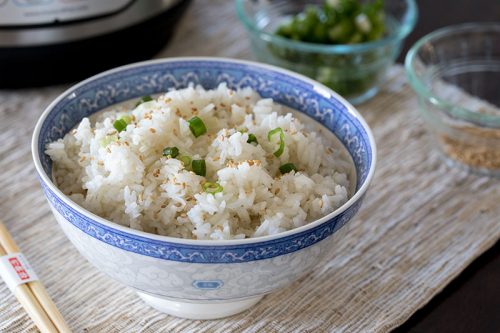
Rinsing rice before cooking helps remove starch from the surface, resulting in rice that is less sticky. A member of the Pressure Cooking Today community recommends rinsing the rice with very hot water until the water runs clear. Then let the rice sit in hot water until it turns bright white. If you have time for this extra step, it produces great results.
Toast your brown rice before cooking to add a deeper flavor. Select Saute and melt 2 tablespoons of butter in the pressure cooking pot. Add the brown rice and toast for about 3 minutes, stirring constantly, until the rice spells nutty. Add the water and salt and cook as directed.
Rice will continue to absorb liquid as it chills. When reheating rice, whether it’s plain White Rice or a creamier Maple-Almond-Raisin Breakfast Risotto (page 42) or the Best Pressure Cooker Rice Pudding Ever, you’ll need to stir in a little more liquid until the rice reaches your desired consistency.
Figure out the perfect cook time for pasta by halving the time listed on the package and then subtracting an additional minute. (So if the pasta takes 10 minutes to cook on the stovetop, it’ll need a 4 minute high pressure cook time in the pressure cooker.) Use a quick pressure release. Get more tips on my How to Cook Pasta in Your Pressure Cooker Post.
Desserts
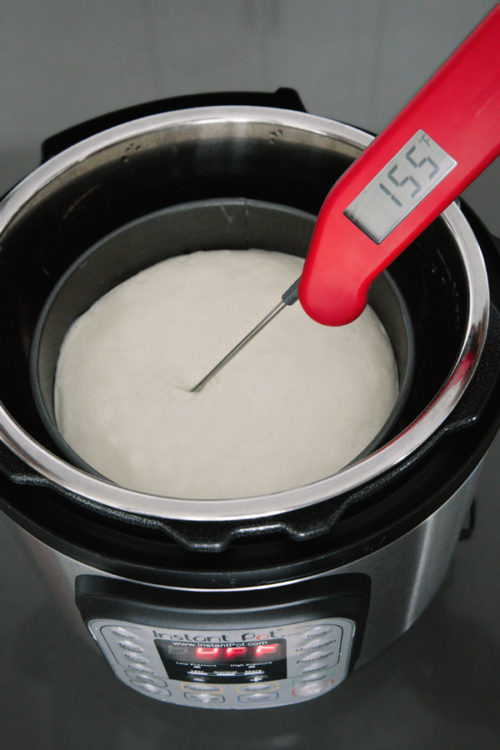
Use an instant read thermometer to know when your cheesecake is done. Make your life easy—rather than trying to guess whether your cheesecake is too jiggly or not jiggly enough in the middle. If it’s 150°F or slightly higher in the center, you’re good to go. If not, cook the cheesecake at High Pressure a few minutes more. (There’s not a science to it—the amount of extra time depends on how close it is to 150°F.)
Have all of your cheesecake ingredients at room temperature, especially the cream cheese and the eggs.
Know your timing. Your cheesecake timing will vary based on the pan you’re using, the ingredients (candy add-ins like white chocolate will increase the cook time), and whether you’ve covered your pan with foil (add at least 5 minutes to the High Pressure Cook Time if you want to cover a cheesecake with foil but the recipe cooks uncovered). When cooking uncovered, use the corner of a paper towel to absorb any liquid that may have accumulated on top. (Barbara has several more tips on her Making Perfect Cheesecakes in the Instant Pot / Pressure Cooker post.)
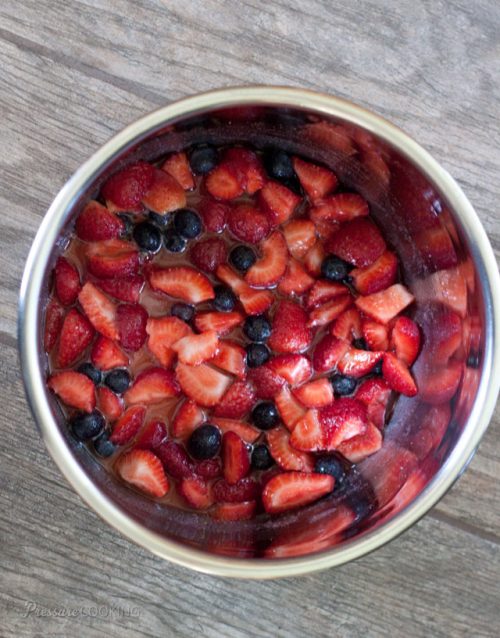
Add a diced apple to stretch pressure cooked fruit desserts, like Pressure Cooker Berry Compote. If you don’t quite have enough berries for the recipe, add a diced apple. The apple will add structure and volume to the compote without significantly changing the flavor.
You can generally substitute frozen fruit if you want to make a pressure cooker dessert with fruits that aren’t in season. You’ll get a better flavor because frozen fruit is flash frozen at peak freshness.
Use parchment paper on the bottom of the pot-in-pot pan when cooking things that may stick like brownies, bread puddings, etc.
Pressure Cooking Tricks: Freezing and Storing
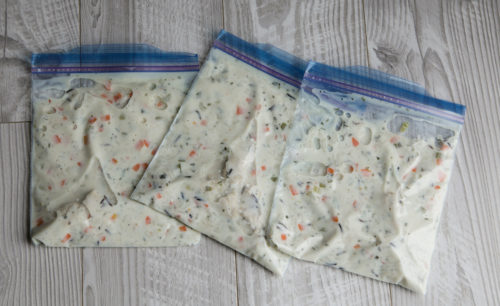
Whenever I’m cooking grains or soups, I almost always make a double batch. It’s not really more work to double everything, and I love having leftovers. I like to freeze the leftovers in single-serve portions in a freezer-safe ziplocks (you can buy reusable if you like). Here are the portion-sizes that work well for my family:
- Breakfasts (steel cut oats, risotto [page 42], and farro): 1 cup portions
- Rice: 1/3 cup portions (I love to use Cilantro Lime Rice to dress up lunchtime burritos and salads)
- Soups: 1 cup portions
Gallon-size freezer ziplocks are the perfect size to fit a half-size Bundt cake. To save it for more than a month or two, wrap well with plastic wrap then place in the freezer bag; if you’ll be eating it sooner, you can skip the extra layer of plastic wrap.
If I’m meal prepping uncooked meals, I freeze them in round containers that fit inside my pressure cooking pot. (Marci has a great tutorial of prepping pressure cooker/Instant Pot freezer meals.)
Large round plastic storage containers are a great way to store, transport, or gift pressure cooker cheesecakes or bundt cakes. (Just make sure the container is large enough—we’ve found ones that fit from Glad, Ziploc, and a no-name brand from the local dollar store.) Simply turn the container upside down, place the cheesecake on the lid, and carefully lower the plastic container over the top. (Shoutout to Christine in our Electric Pressure Cooker Facebook Group for this brilliant idea!)
Slice the cheesecake into individual slices, place on a freezer-safe plate or baking pan and freeze until hard. Then wrap each slice with plastic wrap and place slices in a freezer-safe ziplock bag.
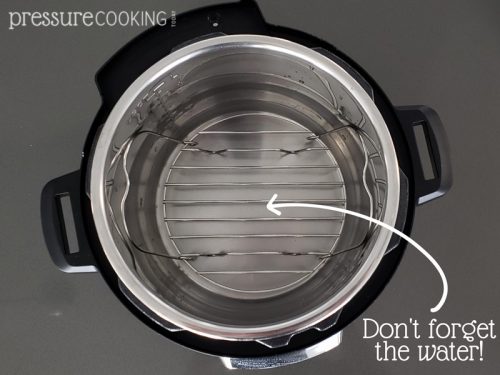
When possible, I like to reheat my food in the pressure cooker. Unlike microwaved foods, meats stay moist and pastas don’t dry out. It’s easy to do. Simply place a trivet and 1 cup of water in the bottom of the pressure cooking pot. Place your food in an ovenproof dish on top of the trivet. Cook on High Pressure until food reaches desired temperature. The exact amount of time depends on how much food you’re reheating and the type of food. I generally start with 5 minutes for single servings and work up from there for larger amounts of food.
What do you do to make things easier in the kitchen? Any pressure cooking tricks that are must-know for you? Let me know in the comments section and I’ll add them to the list!
More pressure cooking tips and tricks:
- Getting Started with Your New Instant Pot or Electric Pressure Cooker
- How to Convert a Recipe to a Pressure Cooker Recipe
- How to Cook Pot-in-Pot
- Which Instant Pot Buttons to Use
- How to Get a Pan Out of the Pressure Cooker
- Choosing between Quick and Natural Pressure Release
Pin It:


Thank you so much for this information! I’m so happy to have found your website. I’m learning more about using my Instant Pot here than on any other site!
Pingback: Instant Pot / Pressure Cooker Peanut Butter Cup Cheesecake - Pressure Cooking Today™
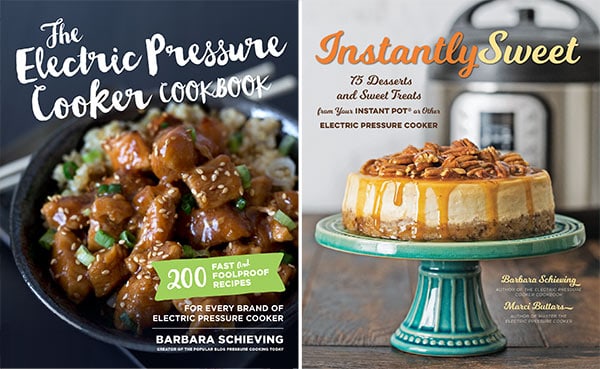
Thank you for this information and for linking your cookbook “The Electric Pressure Cooker Cookbook” on Amazon. My bookshelves have no more room so I have been ordering Kindle eBooks instead of bound books. There was a special on your Kindle cookbook so I snatched it up gleefully. Can’t wait to start bookmarking all of the tasty-looking recipes to try!
That’s great – thanks Linda!
Thanks for all the great tips! This blog was the first- and best!- I found when I got my IP, so I have learned a lot and we have eaten a lot of good food from your blog posts.
We use vacuum-sealed bags in the freezer and foods keep longer so we can have more variety/longe rotation. We did find it best to freeze most foods before sealing, so use/reuse the plastic containers like Glad and Ziplock first to portion and freeze, then transfer the block to the vacuum seal freezer bags and vacuum seal. This extra step keeps liquids in the bag and baked goods from almost liquefying with the vacuum. We also cut the bottom out of a 9.5 oz container to use as a funnel- keeps the bag top free of food which would prevent sealing.
When freezing, keep in mind the size of the glass dishes you will use to heat up the frozen block. If your frozen block is bigger than the dish, you may end up with a mess in the microwave! (BTDT)
So many posts say to add one cup of water to the IP- is this for a 6 qt.? I know it depends on the amount of liquid in the food, but our 8 qt. IP states it needs 18 oz. total liquid. I guess I should assume a recipe is for a 6 qt. unless otherwise noted, and adjust accordingly?
Thanks for sharing your freezing tips! Yes, 1 cup is for the 6 quart IP, you will need additional liquid for an 8 quart. Most recipes are written for the 6 quart since that’s the most common size.
What an information packed post, Jenn-you’ve covered so much and shared so many wonderful tips. I can’t think of anything to add! I do a lot of the things you do-prep ahead as much as I can is a big one. I so a lot of freezing of leftovers. There’s just 2 of us here now, but I’ve never been one to cook for 2, I still make big batches of recipes and freeze leftovers to have on busy days. Leftovers are the best-they’re my “nights off” from cooking! Soups are a favorite of ours so I do a mega chopping session of onions, celery, carrots and garlic then divide it up to make multiple soups for the week-great for lunches and dinner. I do a lot of pressure cooking and have learned so much from your Mom-and have more to learn-from both of you! Mother-daughter lunches are the best-as is having fun in the kitchen. I enjoy the times my daughter and I cook together too…doesn’t happen as often as it used to since we’re almost an hour apart but it’s always fun to get together and create something delicious-and she loves her pressure cookers too!
Thanks Carol! I’m sure we could both learn a lot from you.
I love goodies like this! Great post, I devoured the whole thing 🙂
Thanks Marci!