
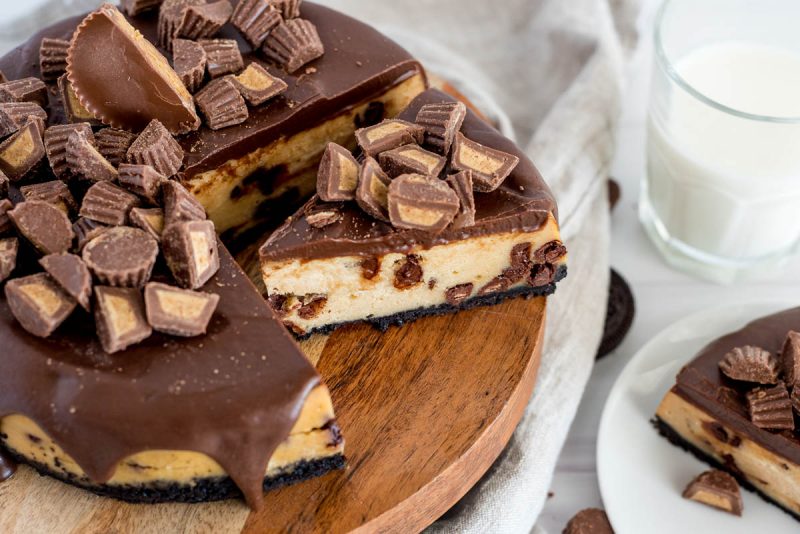
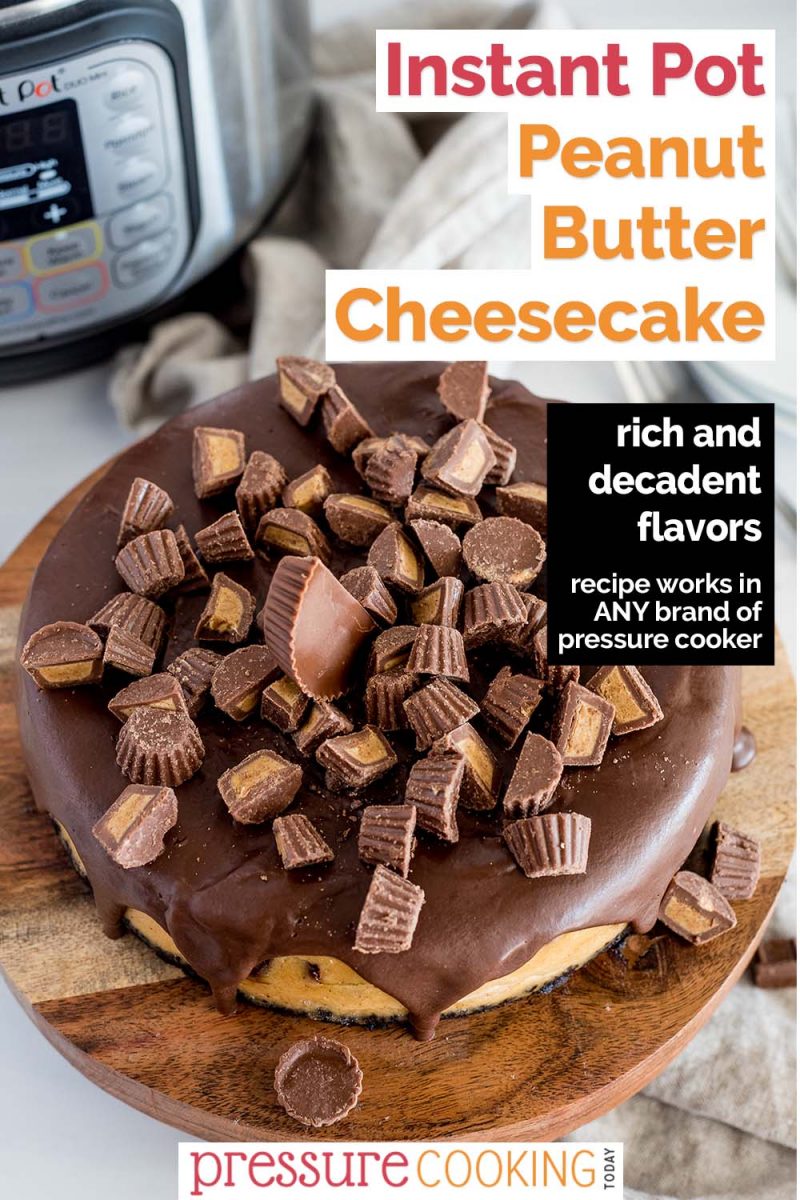
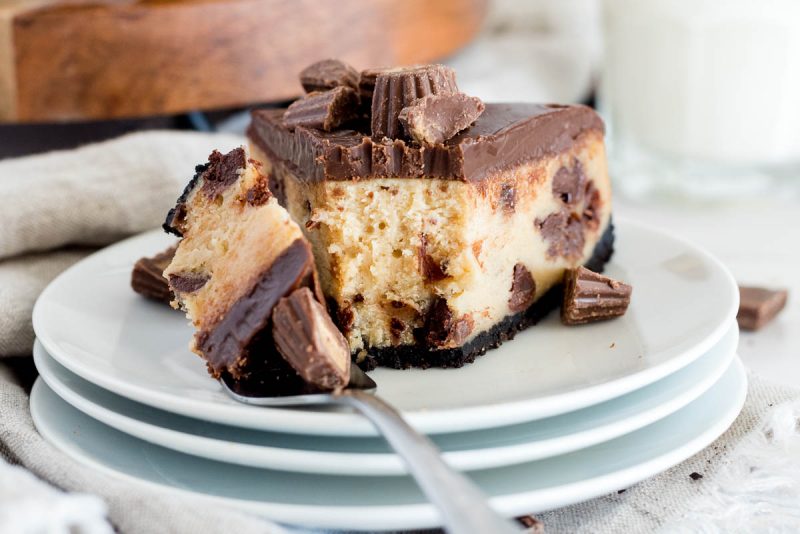
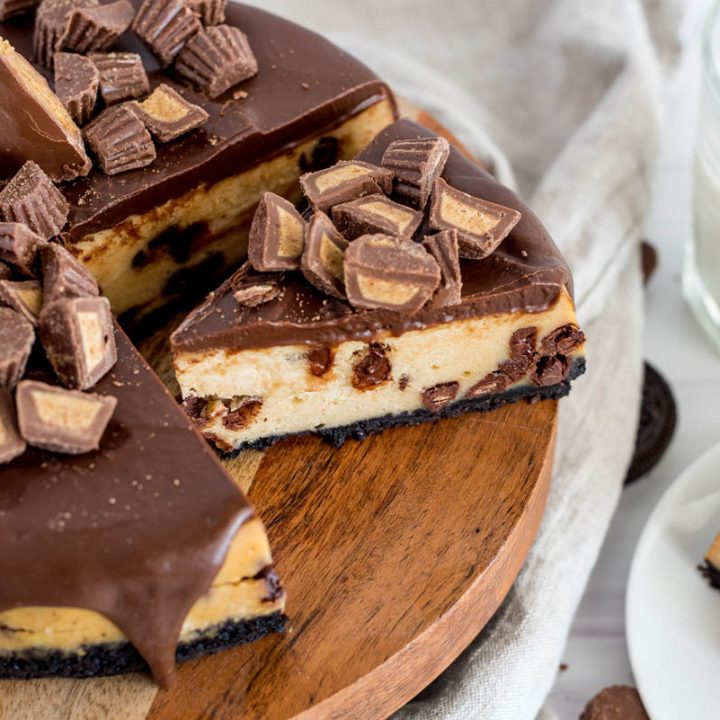
Instant Pot Peanut Butter Cup Cheesecake
This Instant Pot Peanut Butter Cheesecake has a crisp Oreo cookie crust and a creamy whipped peanut butter filling. This chocolate-topped treat is one of the best Instant Pot cheesecake recipes!
❤️ Why You’ll Love This Recipe: This treat is made for peanut butter lovers. It features the timeless combination of chocolate and peanut butter, but it’s quick and easy to put together. There’s no water bath or oven necessary when you make your cheesecake in a pressure cooker!
This recipe is a new riff on my Instant Pot Samoa Cheesecake. I added peanut butter and chocolate chips and topped it with chocolate ganache and chopped peanut butter cups.
Update: This is one of our most popular cheesecake recipes, which I make all the time! I’ve updated the post with new tips, tricks and photos to help you make it at home.
How to Make Peanut Butter Cheesecake in an Instant Pot
This Pressure Cooker Peanut Butter Cheesecake recipe will work in any brand of electric pressure cooker, including the Instant Pot, Ninja Foodi, or Power Pressure Cooker XL.
If this is your first time making cheesecake in an Instant Pot, start by reading my guide to Perfect Pressure Cooker Cheesecake.
The key to making smooth and fluffy cheesecake is to use room temperature ingredients. If your ingredients are too cold, your cheesecake may be lumpy.
Tip: If you forgot to get your ingredients out, place the eggs in a bowl of lukewarm water. Place the cream cheese in a ziplock bag in a bowl of slightly-warmer-than-lukewarm water for about 15 minutes.
In addition, it’s very important not to overmix your ingredients. It should be smooth, but if the cheesecake gets too much air in it, the cake will rise and fall when it cooks.
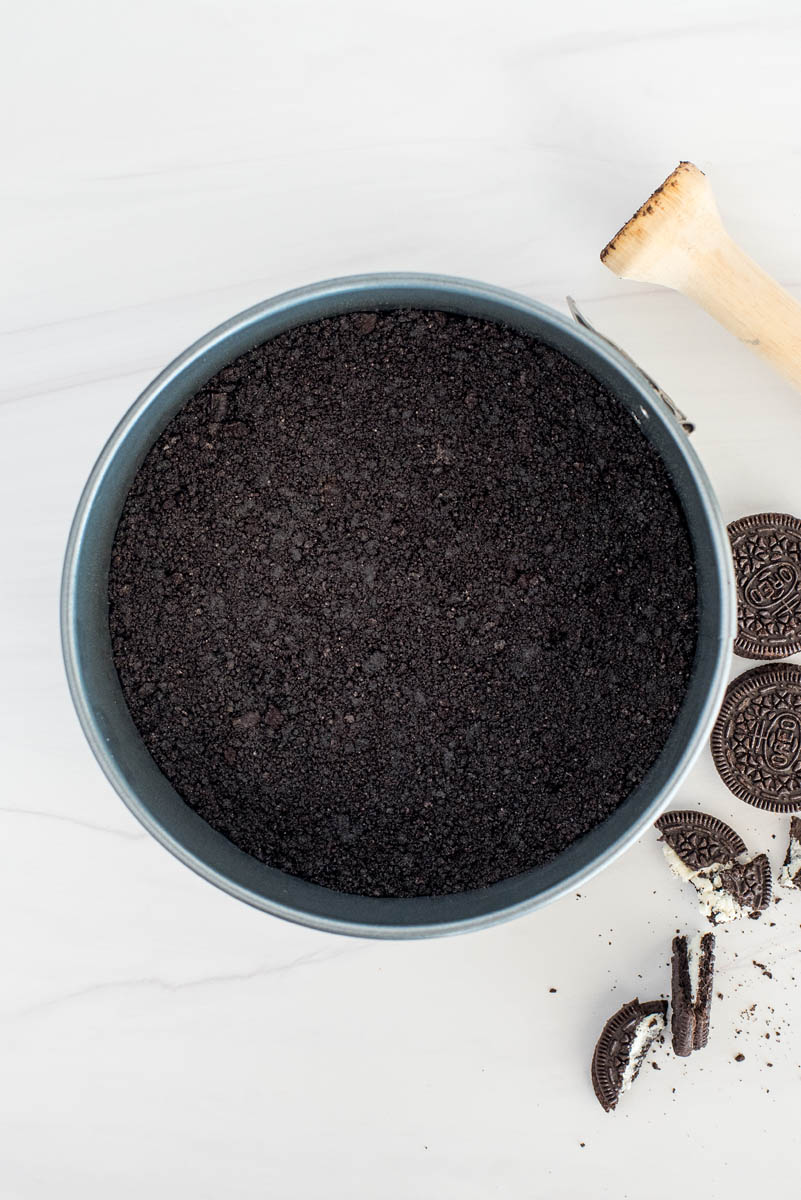
Oreo Cookie Crust
The oreo cookie crust for this cheesecake uses just two ingredients and requires no baking. You can use a food processor to make Oreo crumbs. Or simply put them in a Ziploc bag and use a rolling pin to break the cookies down into a sandy texture.
Adding melted butter to the cookie crust ensures that it holds its shape well when cooked. So you don’t have to worry about anything falling apart!
Tips for Making Cheesecake in the Instant Pot
We make Instant Pot / pressure cooker cheesecakes all the time. Here are some of the best tips for making sure your peanut butter cheesecake comes out perfectly the first time.
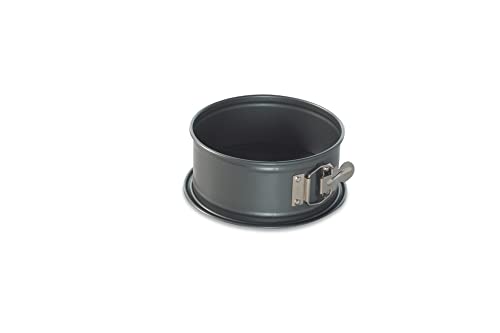
Cheesecake Pan
You can use either a springform pan or a push pan with a removable bottom to make cheesecakes in the pressure cooker. I prefer to use springform pans for their tight seal.
A 7-inch pan fits nicely inside a 6-quart Instant Pot or other 6-quart electric pressure cooker. The
Tip: If you’re using a 3-quart like the Instant Pot Mini, you can just fit a 6-inch push pan with no lip.
Will a Springform Pan Leak?
No matter what the labels say, I don’t believe any “leak proof” pan is truly leak proof. It’s likely that your pan will leak some melted butter from the crust. When that happens, I just use the corner of a paper towel to absorb any liquid in the trough before I unhook the springform pan.
If needed, you can always line your springform pan with foil.
Do I need to cover my cheesecake in the pressure cooker/Instant Pot?
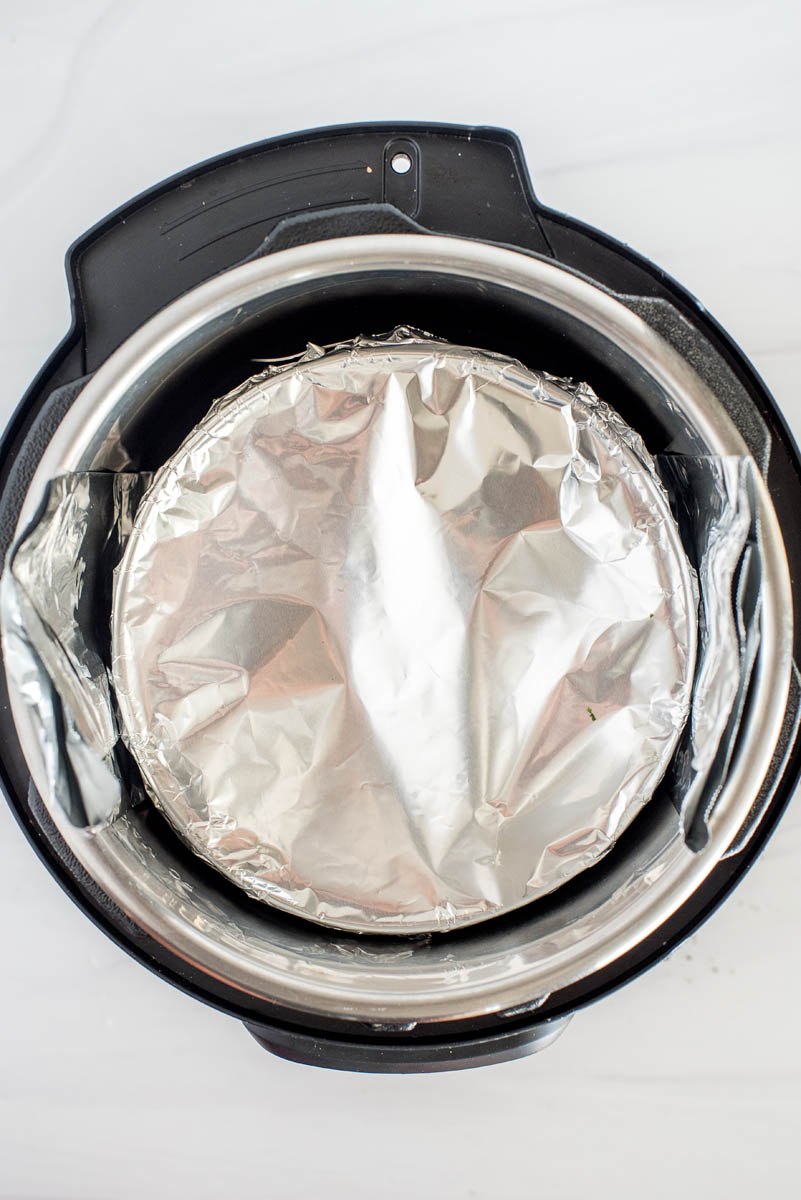
One of the most common questions I get about cheesecakes is whether they should be cooked covered with aluminum foil. Ultimately, it’s completely up to you!
I prefer to cook most cheesecakes uncovered because they cook a bit faster. However, for this Instant Pot Peanut Butter Cheesecake, I cook the cheesecake covered. Just stretch the foil tightly across the top and down the sides of the springform pan. (No need to poke a hole for venting.)
How do I keep my Instant Pot cheesecake crust from getting soggy?
Since the pressure cooker cooks with steam, the crust may become a little softer than an oven-baked crust. However, your Instant Pot cheesecake crusts shouldn’t be soggy or gooey!
When you’re pressing the crust into the cheesecake pan, don’t press it more than 1/2 to one inch up the side of the pan. Be sure the crust is firmly pressed to help it keep together when filled.
And don’t skip the freezing step, either! It helps your crust firm up and stay separate from the rest of the cheesecake.
If you’re worried about the water from the Instant Pot getting to your crust, place your cheesecake on a taller trivet.
Another way to prevent a soggy cheesecake bottom is to melt a little bit of baking chocolate and use a pastry brush or spoon to spread a very thin layer of chocolate over the crust before freezing. The chocolate will act as a barrier to keep moisture out of the crust.
If you’re really concerned about a soggy crust, you can prebake your crust to help them set. I’d start with 7 minutes in the oven at 350°F. (Be sure to let the crust cool before filling.)
More Instant Pot / Pressure Cooker Cheesecakes You’ll Love
- Meyer Lemon Pressure Cooker Cheesecake is a bright and refreshing dessert for the spring and summer.
- Instant Pot / Pressure Cooker Caramel Pecan Cheesecake is a show-stopping, sweet and nutty dessert for any occasion.
- Hollywood Two-Tone Cheesecake in the Pressure Cooker is an elegant chocolate and vanilla cake for the best of both worlds.
- Pressure Cooker / Instant Pot Cheesecake Pops are cute two-bite treats that kids love.
- Red White & Blue Instant Pot Cheesecake is a go-to dessert for the 4th of July and Memorial Day
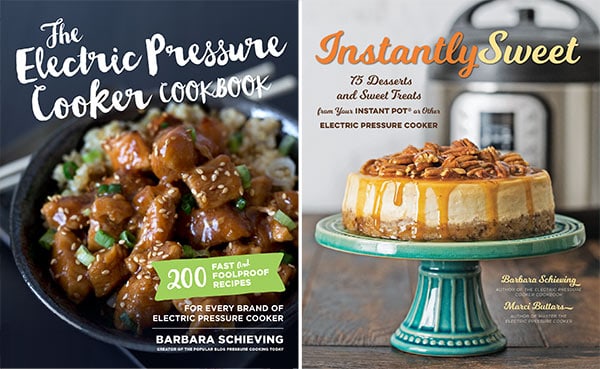
For more Instant Pot cheesecake recipes, my Instantly Sweet cookbook has several new flavors, including:
- Instant Pot Japanese Cheesecake (page 54)
- Pressure Cooker Red Velvet Cheesecake (page 48) with White Chocolate Ganache (page 42)
- Tropical Cheesecake (page 41)
- Mini Lemon Cheesecakes in a Jar (page 57)
Do you LOVE this recipe?
Leave us a review below to tell us why!
Pressure Cooker Peanut Butter Cup Cheesecake
This easy peanut butter cup cheesecake is made in an Instant Pot and loaded with chocolate, candies and a thick and creamy cream cheese filling.
Ingredients
- 1 cup crushed Oreo cookie crumbs
- 2 tablespoons butter, melted
- 12 ounces cream cheese, room temperature
- 1/2 cup sugar
- 1/2 cup smooth peanut butter
- 1/4 cup heavy cream
- 1 1/2 teaspoons vanilla extract
- 1 tablespoon all-purpose flour
- 2 eggs, room temperature
- 1 egg yolk, room temperature
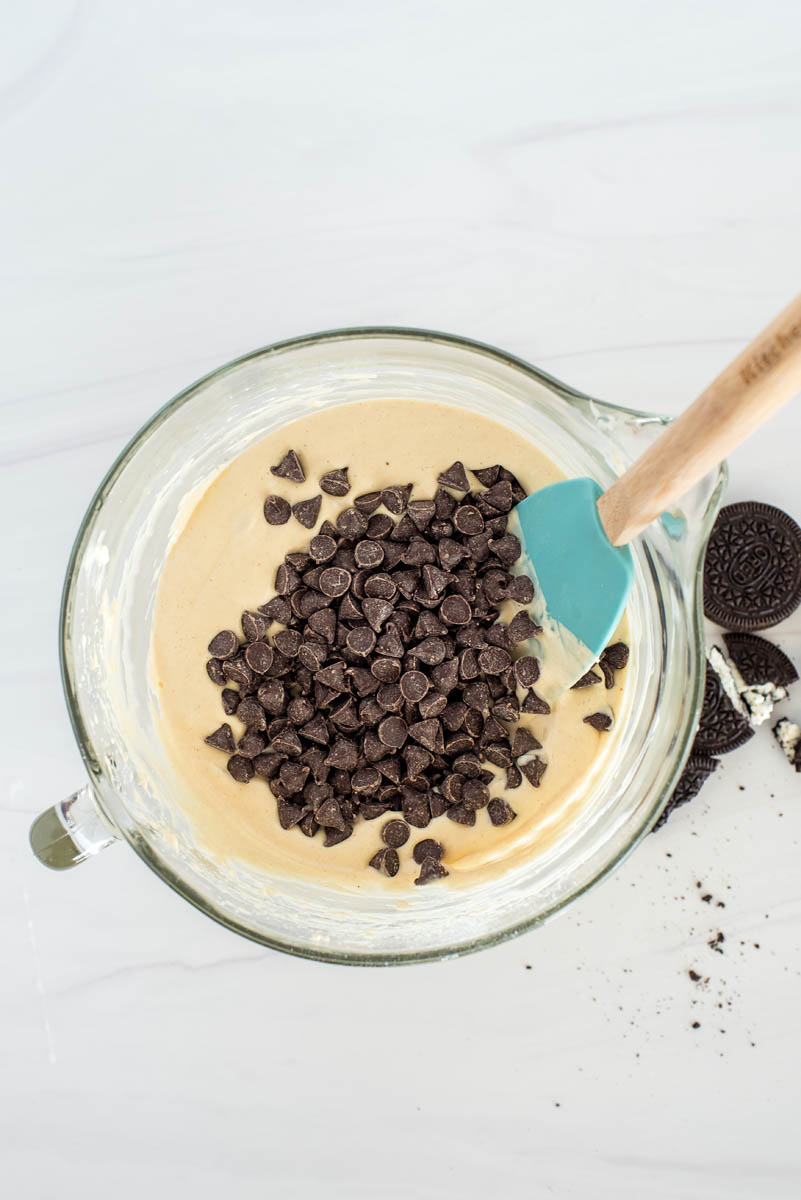
- 3/4 cup semisweet chocolate chips
Chocolate Ganache Topping
- 6 ounces milk chocolate, finely chopped
- 1/3 cup heavy cream
- 2/3 cup coarsely chopped peanut butter cups
Instructions
- Prepare a 7-inch springform pan by coating it with a nonstick spray. Use a parchment round, if desired.
- In a small bowl, combine the Oreo cookie crumbs and butter. Spread evenly in the bottom and no more than 3/4-inch up the side of the pan. Place in the freezer for 10 minutes.
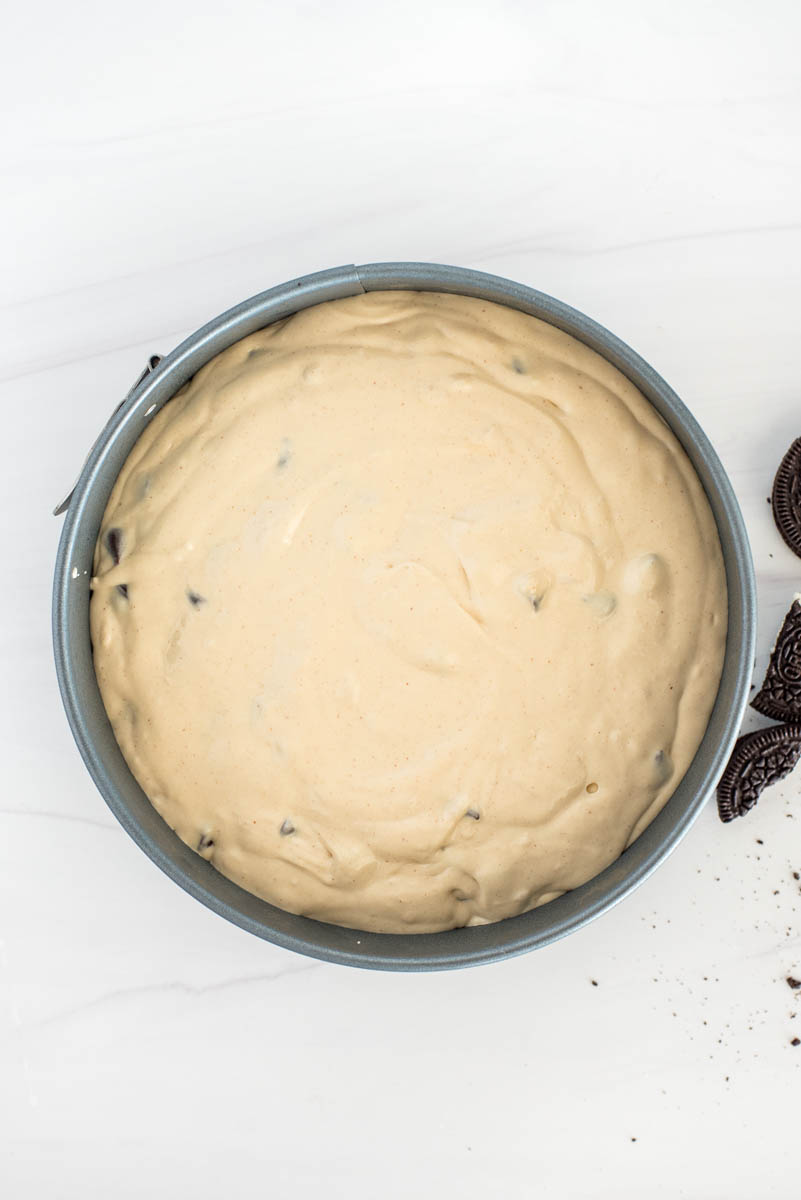
- In a mixing bowl, mix cream cheese and sugar at medium speed until smooth, blend in peanut butter, heavy cream, vanilla, and flour. Mix in eggs one at a time just until blended; don't over mix. Stir in chocolate chips.
- Pour batter into the springform pan on top of the crust. Cover top of springform pan with aluminum foil.
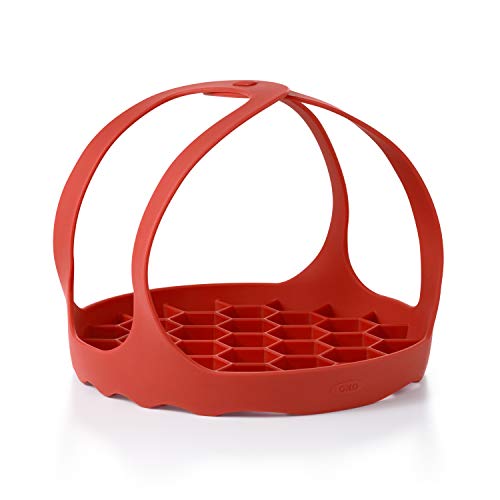
- Pour 1 cup of water into the pressure cooking pot, and place the trivet in the bottom. Carefully center the filled pan on a foil sling* and lower it into the pressure cooking pot. Fold the foil sling down so that it doesn't interfere with closing the lid.
- Lock the lid in place. Select High Pressure and set the timer for 50 minutes. When the cook time ends, turn off the pressure cooker and allow the pressure to release naturally for 10 minutes, then use a quick pressure release to release any remaining pressure. When valve drops, carefully remove lid. Remove cheesecake from the cooking pot and check to see if the middle is set (about 150°F on an instant read thermometer). If not, return the foil and cook the cheesecake for an additional 5 minutes.
- Remove the springform pan to a wire rack to cool. Remove aluminum foil. When cheesecake is cooled, refrigerate covered with plastic wrap for at least 4 hours or overnight.
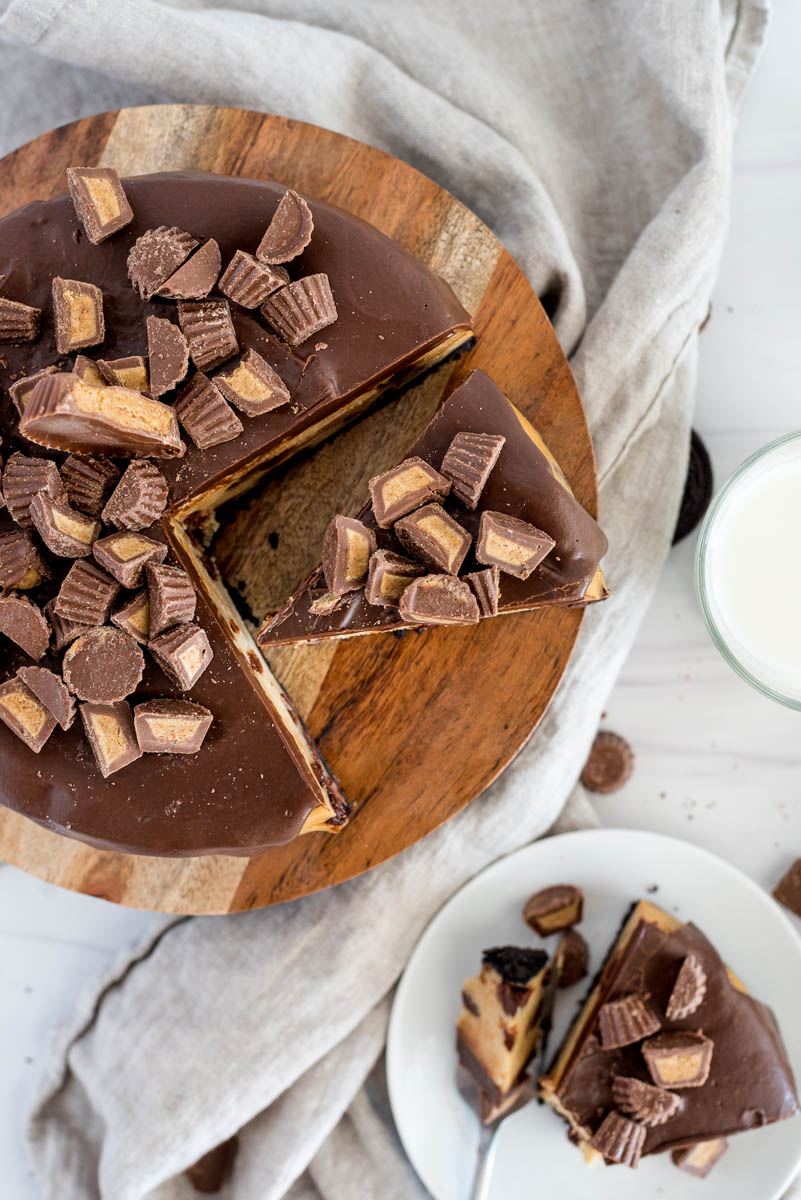
- When cheesecake is chilled, prepare topping: Place half of the chocolate in a mixing bowl. Heat heavy cream on medium high heat until it comes to a boil. Remove from heat and immediately pour cream over chocolate and stir until chocolate is completely melted. Add remain chocolate and stir until chocolate is completely melted. Cool until ganache is thickened but still thin enough to drip down the sides of the cheesecake.
- Spoon chocolate ganache on top of the cheesecake, spreading to edges and letting it drip down the sides. Pile coarsely chopped peanut butter cups on top. Refrigerate until ready to serve.
Notes
*Make a sling with a 20 inch piece of aluminum foil, folded three times length wise.
Recommended Products
As an Amazon Associate and member of other affiliate programs, I earn from qualifying purchases.
Nutrition Information:
Yield: 10 Serving Size: 1Amount Per Serving: Calories: 597Total Fat: 42gSaturated Fat: 21gTrans Fat: 0gUnsaturated Fat: 17gCholesterol: 117mgSodium: 308mgCarbohydrates: 49gFiber: 3gSugar: 39gProtein: 11g
FOR MORE FROM PRESSURE COOKING TODAY
🥘 Browse our collection of the best pressure cooker / Instant Pot recipes.
💬 Follow Pressure Cooking Today on Facebook and Instagram for the latest updates.
👥 Join our Electric Pressure Cooker Facebook Group. Our positive community of pressure cooking fans use all brands of electric pressure cookers, so it’s a great resource if you have questions about your particular brand.
🥧 If you’re interested in more than just Instant Pot recipes, follow us at Barbara Bakes. There we post amazing breakfasts, breads, and the best dessert recipes!


I am going to make this today. But I only have a 4″ springform pan, I will fill in no more then 2/3 full, but Im wondering about the cooking time. (I will use leftover filling for chessecake bites). Recipe says to cook for 50 minutes, but with the smaller pan, how much time should I take off of the 50? I dont want to over cook it. Thank you.
Hi Kathy – I cooked my 4-inch cheesecake https://www.pressurecookingtoday.com/pressure-cooker-heart-shaped-cheesecake/ for 6 minutes uncovered. This cheesecake because of the addition of peanut butter, takes longer to cook, so I would try 8 minutes uncovered with a 10 minute natural pressure release and see if it’s set.
Still raw after 50 min. Going another 30.
Looks so yummy.
Thanks! It definitely is yummy.
I just have a 6 inch push pan. Could you tell me time difference ? Thanks
I’d try it with the same cook time and check it and see if it needs more time after the natural release.
Yesterday was my husband’s birthday. His favorite dessert – cheesecake. His favorite candy – peanut butter cups. I made this as a surprise. He loved it! I used a 6″ springform pan and only omitted a small amount of the cheesecake mixture. I also sprayed the aluminum foil with baking spray before covering just in case the cheesecake came into contact with it while baking. Easy peasy. I can’t wait to try your other recipes!
Can I replace half and half for the heavy cream? I have everything to make it except for heavy cream. I think I read in a comment you can use sour cream as well. What do you suggest between half and half and sour cream? My guess is you couldn’t use sour cream to make the ganache?
Hi Tiana – yes, you can sub half and half for the heavy cream. If will probably take longer for the ganache to thicken, so be patient. Enjoy!
Barbara this cheesecake is amazing. My husband is a big fan of chocolate peanut butter. He absolutely loved it.
I have a 10 qt PC and a 9 inch springform pan. I was very unsure if I should make 1 1/2 the recipe or double it. So I figured I would rather have too much than not enough, I doubled it. All the batter fit in my 9 inch. Also I doubled the ganache, had a little left over.
Cooked it on high for 1 hour. NR for 10 min. It was perfect.
Between my husband and my 4 children there was barely anything left.
Can’t wait to make it again.
Thanks so much Dawn! It’s nice to know an hour cook time was perfect for a 9-inch springform pan when you double the recipe in your 10-quart pressure cooker.
Thanks so much for sharing your recipes! It seems my cheesecakes are being overbaked. Both the strawberry and pb cheesecakes from your cookbook have been 90′ C when I checked internal temp. I’m guessing it’s my pressure cooker (Bella brand) but wondered if you have suggestions for how I can adjust baking times. Thank you!
That’s so nice . thanks Emmy! The pan you’re using can make a difference as well as your altitude in addition to different brands. You can reduce the cooktime a little bit next time, unless you were happy with the texture of your cheesecake, then I wouldn’t change a thing. Shorter cook times will be a creamier cheesecake, long cook times will be a little more dense. If the cheesecake was pretty and had a great texture, I woudln’t worry about the higher temperature.
Could you pressure cook this cheesecake in half pint mason jars, if so how much better in each jar and how long would you cook them?
Hi Theresa – yes, you can make pressure cooker cheesecake in Mason jars. I haven’t tried this one, but I think 5 minutes would be about right. Don’t fill the jars more than 2/3’s full because the cheesecake does rise and fall as it “bakes”.
Hi Barbara,
I made this on Tuesday and it turned out great. Posted a pic of the finished product on the Instant Pot Community page and it has received nearly 2000 likes. I made sure to include the link to the recipe several times in the comments. Kudos to you for a great recipe.
Sincerely,
Rocky Lawrence
Thanks for sharing Rocky! Glad it was a hit. I’ll go check out the pic 🙂
This recipe sounds amazing and I would like to try it. However, I see that you only use 12oz of Cream cheese. Packs are 8 oz not 6 oz. Would it hurt to add the extra 2 oz from each block?
Hi Julie – it may be too much volume for your springform pan, but you can try it. Just don’t fill the pan more than 2/3’s full. You could make an individual one later if you have extra batter.
I made this cheesecake yesterday exactly by the recipe. It is delicious! Turned out perfect!
That’s great – thanks Jackie!
Can this be made with a brownie bottom instead of a cookie crust? I’m a huge fan of these type of cheesecakes and would love your opinion!
Hi Carly – yes, I used a brownie crust in this cheesecake https://www.pressurecookingtoday.com/pressure-cooker-black-forest-cheesecake/just combine the two recipes. Enjoy!
I made this amazing pot of the weekend anything out amazing! My only complaint is that it was too small. If I were to follow this recipe and put it in the oven, so that I can make a larger version, what would the cooktown be?
Thanks Trisha – so nice to hear you loved it! If you were to bake it in the oven, you’d want to double the ingredients and bake it in 9 inch pan in a pan of water as described in this recipe https://www.barbarabakes.com/strawberry-cheesecake-with-an-oreo-cookie-crust/ and cook it for 80+ minutes until the center is 155 degrees F. Enjoy!
When the recipe calls for Oreo cookie crumbs, should I remove the filling before crushing? Or does that include the whole cookie? (Not that it’s a hardship to remove the filling. . .I have plenty of space for it in my belly!)
Hi Denise – I’ve done it both ways and it doesn’t seem to matter much. Maybe do half and half – some for your belly lol.
Hi Barbara,
I made this cheese cake 3 years ago and it was amazing!
I use a Fagor 8 quart stove top cooker.
I neglected to make notes about the cooking time at higher pressure, (15psi).
I generally deduct 15% cook time from instant pot recipes. ~42 minutes is the calculation.
Or, do you think I should use low pressure instead and increase the time? (7-8psi).
Also, is 155F the target temperature for doneness?
Thanks!
Thanks Gary! 42 minutes at high pressure sounds good to me. The target is 150 F.
Can I substitute the heavy cream with anything? Also, would leaving the chocolate chips out of the cheesecake reduce cooking time?
Hi Trisha – you can sub sour cream for the heavy cream. The cook time is the same if you leave the chocolate chips out.
Thank you! I am going to try it this weekend!
Why should a pressure cooker recipe take 50 minutes when a bake in the oven cheesecake takes that long? Seems odd to me.
Hi Debbie – this one takes longer to cook because of the addition of the peanut butter. It would take longer in the oven as well.
Mine turned out rubbery and icky. The crust was soggy. It didn’t look at all like the picture. Not sure what went wrong. I threw it in the trash.
Hi Debbie – sorry you had trouble with the recipe. Here’s a link to my pressure cooking tips to help you troubleshoot https://www.pressurecookingtoday.com/making-perfect-pressure-cooker-cheesecake/ Did you try letting it set up in the fridge overnight before you threw it out? An overnight rest changes the texture.
I would love to try a raspberry and pistachio cheesecake in my Ninja foodi pressure cooker that crisps. What do you think? I would love for you to make one in your pressure cooker. Thank you
Hi Prenby – I think it sounds delicious. I have a raspberry cheesecake that is awesome https://www.pressurecookingtoday.com/pressure-cooker-raspberry-cheesecake/ which you could easily pair with pistachios. Or a pistachio flavored cheesecake with a raspberry curd would be nice https://www.pressurecookingtoday.com/pressure-cooker-raspberry-curd/. You could incorporate pistachios in the crust like in this recipe https://www.pressurecookingtoday.com/pressure-cooker-caramel-pecan-cheesecake/ You could try air frying the crust to crisp it up before adding the cheesecake layer. So many fun possibilities.
First thing made in instant pot, Excellent !!!
Took one piece to work now have to make two more cakes to cover every one at work, one person went out and bought an Instant Pot just so she could make the cheese cake .
Hi Steve – love that you just jumped in and made cheesecake. You’re off to a great start. Thanks for sharing!
I have a large family and would like to make an 8″ cake. Is there a recipe that I can modify?
Hi Beth – use 1 1/2 times the recipe for an 8″ cake if you have an 8 quart pressure cooker. Increase the cook time 10 minutes or until the internal temperature of the cheesecake is 150 degrees. Enjoy!
Never mind, I see the other whipping cream measurement! Sorry!
Hi! I’m curious about the heavy cream. You have it listed in the ingredients list wants but you use it twice in the recipe. Went to the cheesecake and once for their good Nash. Can you tell me what the measurement is for each please? Thank you
Hi Jennifer – I added a heading to the ingredients so it makes it more clear. Enjoy!
In your ingredients list, you have heavy cream But in the recipe, you use it twice so I’m wondering how much you use each time? Once you add it to the cheesecake and once you add it to make the ganache
Hello, I made this cheesecake and it is amazing! I’m planning on making a few for Christmas Eve. Do you have a recipe for the oven?
Thanks Elizabeth! Here’s my most popular oven cheesecake recipe https://www.barbarabakes.com/peanut-butter-cheesecake-chocolate-cake/ You could use the directions for baking it and double the pressure cooker cheesecake recipe – your cook time will be longer because of the addition of the peanut butter to the batter. You want an internal temperature of 150°F. Or, here’s a fun peanut butter option https://www.barbarabakes.com/peanut-butter-cheesecake-chocolate-cake/
I tried the foil on top of the cheese cake a while ago, it had a lot of water on top. I made this recipe again today, except I put a paper towel over the spring form pan, then I put the foil on top of the paper towel, and made sure the foil was tight on the pan. It came out great and very little water. I am sure I have broken a forbidden rule in the world of Instant pot cheese cakes, but it worked!
Hi Shelly – although I don’t like making my cheesecake with a paper towel and tin foil, I know a lot of people prefer it that way. If it works well for you, go for it! I have had problems with the paper towel sticking to the cheesecake top and making a mess, and the cook time is longer if you use foil. So I mostly don’t use foil any longer. But I don’t think there’s a right or wrong way to do it. Thanks for sharing!
I just made this cheesecake to see how it turns out before taking it to a party. You say that the cheesecake center should be 150 in the center with a instant read thermometer, I followed your recipe 50 min high pressure and 10 min npr, should I adjust the 50 min down or the time for the npr?
Thanks for your help
I forgot to tell you mine was 198 in the center.
Hi Angie – you may have gotten a reading from a chocolate chip? You would wait and see how the texture is, if you really like it, then use the same time. If you feel it needed less time, then reduce it.
How far in advance can I make this cheesecake?
Hi Angie – it’s best if you only make it one or two days before serving. Otherwise the crust gets a bit too soft. Enjoy!
OMG. I want this every single day! Fantastic!
This is such an amazing holiday dessert!
I can’t even tell you how much we love this!!!
WOW! I need to get my pressure cooker out and make this ASAP. Looks so good.
Incredible! Love these flavors!
Can you show a picture of the sling?
Hi Rebecca – I did an entire post about the sling and other methods https://www.pressurecookingtoday.com/how-to-get-a-pan-out-of-the-pressure-cooker/
Hi I just purchased your book The Electric Pressure Cooker Cookbook and can’t wait to try the recipes. I was glancing through it and I came across your recipe for Peanut Butter Cup Cheesecake…..I ended up googleing the recipe because I was confused the picture has chocolate in the filling and not in the recipe for the filling. When I pulled up the recipe on line yep it says 3/4 cup semisweet Choc. Chips but it is omitted in the cookbook.
Hi Angela – thanks for purchasing my cookbook. This cheesecake is amazing! Some people commented that chocolate chips in the cheesecake was too much chocolate, so I omitted it in the cookbook recipe. We weren’t initially going to include the picture of this cheesecake in the cookbook but added it last minute. There are some other minor errors in the cookbook listed at the bottom of this post https://www.pressurecookingtoday.com/electric-pressure-cooker-cookbook/ Enjoy!
Thanks for the updates in the cookbook.
BTW too much chocolate never.
lol – never 🙂
I made this cheesecake today. I made the NY style cheesecake #17 recipe 2 weeks ago and it turned out amazing. I can’t wait to taste this one.
My question is, what’s the reason for covering the top of the cheesecake with foil while it cooks? The other one I made didn’t have me do that and it turned out great. Just curious.
Nicole
Hi Nicole – covering the cheesecake eliminates water droplets from getting on the top of the cheesecake. In most of my recipes I no longer cover it with foil because it does slow down the cooking. It’s really just a matter of preference. Hope you love this cheesecake!
Why does it need to cook 50 minutes asn d the others take 26 minutes? I do not want it yo be dry.
Hi Debbie – it needs the extra time because of the addition of peanut butter. Enjoy!
Mine came out much, much less tall than the one in your photo. Can I double the recipe?
Hi Susan – you can’t double the recipe unless you have an 8 quart pressure cooker and use a larger pan. The chilled cheesecake will be about 2 inches tall.
Can you bake the crust for a bit to give it a little more of a crunch?
Hi Denise – yes, just let it cool before adding the cheesecake layer.
Wld love to make this. Just got a 7″ springform pan, but it’s only 2″ tall, not 3″. Is 2″ tall enough? Also, what is the purpose of the sling — if the springform pan is sitting on the trivet inside the IP? Thanks so much.
Hi Elaine – yes, it will work fine, just don’t fill the pan more than 2/3’s full. The sling is to get the pan out of the pressure cooker https://www.pressurecookingtoday.com/how-to-get-a-pan-out-of-the-pressure-cooker/ Enjoy!
Can you freeze this cheesecake and if so how?
Hi Debbie – yes, cheesecake freezes very well. Chill it overnight and then remove it from the springform pan. You can either freeze it whole or slice it into individual servings and freeze it in freezer bags. The 7 inch cheesecake fits in a gallon size Ziploc.
So I’m trying this for the first time and very excited! One question when you remove the pan from the pot to cool, at what point do you take the cake out of the pan? Does it cool in the springform pan? Does it go in the fridge with it?
Thanks!
Hi Kim – yes, cool the cake in the pan and put it in the fridge as well. Then remove the ring before you decorate it and serve it.
Thank you so much!!!
I made this yesterday and had it tonight for dinner. I have never made a cheesecake before and was nervous how it would turn out. It was fantastic!
Thanks great – thanks Cindy!
Just made this Peanut Butter Cheesecake, loved it ! I missed the folding in of the chocolate chips step, but it turned out great, creamy smooth texture. All six adults who taste tested it wanted more. Can’t wait to try some of your other chessecake recipes.
Great -thanks Elisabeth!
I absolutely love this cheesecake. My husband liked it too, but let me know that he likes more of a mousse type cheesecake. How would I make this cake more like a mouse cheesecake?
Hi there! Is there a way to make this in the oven? Or use your no bake recipe but with the Oreo crust? I don’t have a small enough cheesecake pan for my instant pot but would love to make this if there is a way!
Thank you!
Hi Jennifer – you could double the ingredients and bake it in a oven similarly to this recipe https://www.barbarabakes.com/strawberry-cheesecake-with-an-oreo-cookie-crust/ Your cook time will probably be longer because of the cheesecake. Let me know how it goes.
I just made this but it didn’t rise? What did I do wrong? Used a 7in springform pan.
Hi Patty – Cheesecake isn’t like traditional cake that rises. It stays pretty dense and creamy. It will rise a little as it’s cooking but then continue to sink almost back to it’s original height as it cools. Sometimes the angle of the picture makes it look taller than it actually is. Hope you enjoyed it.
I want to try this recipe. I don’t have a spring foam pan, but I do have small silicone cups. Do you think they will work?
I made this in my 8qt with an 8 inch springform pan and it fit fine… I didn’t adjust the ingredients or cook time. Also didn’t have Oreos so I used graham crackers and added two tablespoons of cocoa powder. I agree that adding chocolate chips to the batter is a bit too much chocolate so this Time I used half as much mini chos.
Perfect and a big hit!
Thanks for sharing Barb!
Can I make this in a pyrex glass dish? I don’t have this size of springform pan (yet)
Hi Diane – if it’s an oven safe Pyrex dish that will work, although it’s harder to serve.
I’m so glad that this recipe was posted: the cook book omitted the 3/4 C chocolate chips in the filling. I was going nuts trying to figure out if the recipe picture showed chocolate chips or peanut butter cups in the filling! I will now write it into the book.
Some people told me they thought the chocolate chips in the peanut butter cheesecake was too much chocolate, so I decided to omit them in the cookbook.
I was going to put a picture of the strawberry cheesecake in the cookbook. But I just wasn’t happy with the picture, so at the last minute we subbed the pb cheesecake picture from my site. I forgot about omitting the chocolate chips when we subbed the picture ?
What is this phrase “too much chocolate”? Please translate into something believable. 🙂
lol right!
Same thing with me. It was only my second time using the cooker and the 1st time making cheesecake. I’m not a baker so I was afraid and confused. I did write it in the book though. It’s cooking now so wish me luck!
I’m sure you’ll do great! Enjoy 🙂
For the Oreo crust can I leave the white part of the cookie in and then make the crumbs? I can’t find Oreo crumbs by itself
Hi Cheryl – yes, you can leave the white part of the cookie in and make the crumbs.
Does the water leak into the springform pan at all?
Hi Kerri – no the water does not leak into the springform pan because it’s elevated on the rack and doesn’t sit in the water.
I have a 10 quart pressure cooker from GoWiseUsa. I can put a 10″ pan in without it taking anymore space than the steam inserts. But of course the bottom of the spring form pan is solid in contrast to the steamer accessories. Two questions; one- should I be concerned with the pan diameter interfering with pressure building properly? (I can drop down to the 9″ I also have if it should be a concern) And secondly, how many times should I increase the recipe and or time to cook?
Hi Maria – I would use the 9″ pan so your have room for steam to circulate around the pan. You’ll double the ingredient for a 9″ pan and you’ll need to increase the cook time as well. My guess on the cook time is an hour and fifteen minutes.
Hi. I’d like to make this recipe but I have a question about the peanut butter. Should I used natural peanut butter (with just peanuts in the ingredient list) or regular peanut butter (with sugar and other things added – like Skippy or Jif)? Thanks.
Hi Alanna – regular like Skippy or Jif.
Do you know if it will work with natural peanut butter?
Hi Jamie – I haven’t tried it, but others have had problems subbing natural peanut butter in other recipes, so I can’t recommend it.
I tried it out, because I completely forgot to get “regular” peanut butter. It was delicious! Thanks for the great recipe!
Great to know! Thanks for the follow up Jamie 🙂
Any guesses how to adjust time for a 8″ pan?
Hi Wendy – I haven’t tried it, but I would increase the ingredients to 1 and one half times and try cooking it an extra 10 minutes. Let me know how it goes.
I only had an 8 inch pan. It didn’t work out in my 6 quart because the pan fit so tightly in the pot. So disappointing because my store doesn’t carry smaller springform pans and I was hoping not to have to order. Since I couldn’t get it in with the rack, I just placed the pan in and the sides and crust ended up tasting rather burnt and I had a very hard time getting the pan back out. I’m going to just go with the original recipe and see how that turns out. =)
Sorry Leah – yes, you definitely don’t want to put a pan directly on the bottom of the pressure cooking pot. Here’s a link to my Amazon store with the 7 inch cheesecake pan I use https://www.amazon.com/shop/pressurecookingtoday
How long would I cook cheesecake using a 6″ springform pan?
Hi Mary Kaye – I would add 5 minutes for a 6 inch sprinform pan. Enjoy!
I just made this today in a 6” pan and had to cook for 65 minutes.
Thanks for sharing
Hi there. Thank you for the recipe. When do I remove the spring foam pan?
Hi Katie – it’s really personal preference, but I prefer to let the cheesecake cool to room temperature. Carefully run a thin spatula around the edge, open the springform pan but don’t remove it. Then I close the springform pan and cover the cheesecake with plastic wrap or foil and chill overnight. Enjoy!
Perfect thank you so much for the response. It’s in the fridge and I can’t wait to try it. I have to add the topping to it 8 hrs before it’s served so hopefully that’s ok.
That shouldn’t be a problem. Enjoy!
Can I make this in an oven and if so what steps would I need to take?
Hi Melissa – you would double the ingredients and make it similarly to this recipe https://www.barbarabakes.com/strawberry-cheesecake-with-an-oreo-cookie-crust/. Your cook time will be a little longer because of the peanut butter. Enjoy!
I am planning to make this but just realized the smallest pan I have is 8in. Will this fit in my 6 qt pot? Do you know how I could alter this recipe to fit this size pan?
I made this recently to bring to work and everyone went nuts over it. One of the attorneys I work with took a picture before it was cut and another attorney said it was too pretty to eat! Thank you for all of your wonderful recipes – these cheesecakes really make a beautiful presentation yet are really easy to make. I’ve never baked a traditional cheesecake in my life, yet I think I’ve made at least 20 Instant Pot cheesecakes since buying my Instant Pot at the beginning of last year.
This looks seriously delicious and I am planning on making this my first cheesecake. Thank you for the clear directions and photos. I’m new to Instant Pot (and any form of pressure cooking) – only got my IP last week. I have found that I am having to increase the cooking time because I live at a high altitude. can you tell me how long i should cook this recipe for? Thank you so much!
Hi Donna – Instant Pot cheesecake is great! The technical rule is to add 5 percent more cook time at 3,000 feet above sea level, 10 percent for 4,000 feet above sea level, and so on, increasing by 5 percent every additional 1,000 feet.
Followed the recipe exactly and the cake appears to be very overlooked after 50 minutes. Pretty disappointed after all the other positive reviews and how delicious it looks. Perhaps if I try it again, I’ll use the more standard 15-30minute instant pot cook times.
Hi Amelia – the 50 minute cook time is correct. You need a longer cook time because of the addition of the peanut butter. A few other things can cause the texture to be a little strange, over mixing and forgetting to use a NPR. It’s important to have your ingredients at room temperature. Also, using a non-traditional peanut butter has given some troubles.
However, generally any textural problems are overcome by a overnight chill in the refrigerator and it should taste fabulous the next day when you serve it.
I want to make this peanut butter cup cheesecake and have a couple of questions for you:
1) How many oreos did you use and did you use with or without the cream filling?
2) How many minutes for three 4″ pans and how long of NPR?
TIA!
Hi Debbie – about 12 Oreos for 1 cup. I usually use them with the cream filling, but you could remove it if you’d rather. I’d try 10 minutes with three 4″ pans and a 10 minute NPR. Let me know how it goes 🙂
Thank you for your reply. I did 10 minutes and it was still a little soft in the center, so I put it back in for 2 minutes. Next time I will try 12 minutes from the beginning. I used 12 Oreos with the filling. They were awesome and everyone raved about them! I have a 7″ one in my pot right now for a friend’s birthday. Thank you for the wonderful recipe!
Thanks for coming back and letting us know how it went. It’s so helpful to others. So nice to hear everyone raved about them. 🙂
Omg, this cheesecake is seriously delicious! My family went nuts over it. Pretty easy, the directions are perfect. I didn’t change a thing. Next time I will wrap the bottom of my pan in foil, some of the butter leaked out. I folded the foil over the top pretty tight as I didn’t want any water in or on the cake. 50min was perfect cook time with my 7″ silicone springform. Can’t wait for your cookbook!!
So fun to hear you and your family loved it Lori! My cheesecakes often leak a bit of butter into the water as they cook, but it doesn’t cause a problem. Thanks for the shout out about my cookbook!
Hi Barbara. I made this yesterday. Oh my gosh! It is so very good. 🙂 I used chocolate graham crackers instead of Oreos. I made it in a 7×3 push pan and cut it into 8 slices. I almost couldn’t finish my slice. It was so very rich. Great thank you so much for posting this recipe. 🙂
I made this but used mason jars. It is delicious but very rich. I could only eat a half of an 8 oz. jar at a time. Yum!
Hi Roxanna – How fun to make it in mason jars. What cook time did you use? It is very rich. Glad you enjoyed it 🙂
I lucked out and didn’t find a springform the right size, so it’s going in the oven in a 10.5″, eeks! I upped the crust and added about 1/3 more of everything. It’ll be an experiment but I at temp and duration should I bake this?
Is the 7 inch pan a 7×2 or 7×3?
Hi Tami – 7×3
what is the recipe for the oven so it turns out the same? using a 9 in pan
Made this awesome recipe yesterday…. SO GOOD!!
I had enough ganache to cover the entire cheesecake & still had a spoonful of that lusciousness to enjoy while sipping my coffee *wink*
Thank you!!!
My 6″ inch cheesecake pan has removable bottom but not springform. Will that work?
Hi Steve – yes, others have used a removable bottom pan for pressure cooker cheesecake successfully. Enjoy!
Would 10 minutes be enough for three 4″ pans?
I might start with 8 minutes and see if they’re done enough. Let me know 🙂
So if you do 5 more minutes, should you do a quick release right after or still natural pressure release?
Hi Leslie – a natural pressure release each time. Cheesecake especially likes a slow release. Enjoy!
how many minutes would do you think I should change it to if I have a 6 inch pan?
Hi Sophia – probably an additional 5 minutes.
Longer for a smaller pan?
For a 6 inch pan you may need longer, but I would probably check it first and then cook it longer if needed.
Catherine, did you add an additional 5 minutes? If so how did it turn out?
Would this recipe work in a regular oven?
Hi Mary – yes, you can. Are you going to make a 7″ one or a full size 9″ one?
I am brand new to pressure cooking. I just got my Instant Pot and have only made one meal so far…..pork ribs, and they were amazingly tender.
So when I saw the picture of your beautiful peanut butter cup cheesecake I wanted to make it right away. But I have a question. You say a 7″ spring form pan is needed. So I went and checked my pans, since I had bought a 3 pan set a long time ago. My smallest pan is a 8 inch. I tried to fit it in my Instant Pot. I found that the 8″ will fit in it if I fold the trivet handles under the trivet. I had to fold them under the trivet, because if I tried to fold them on top the trivet then the spring form pan sat tilted a little bit. So do you think the 8″ would work OK if I folded my trivet handles under neath and used a foil sling to lower the pan in and pull it out? Since you are experienced, I thought it would save me having to buy a one inch smaller pan if you thought this way would work OK. and if I would have to cook it a minute or two less . My other question is about you saying to cover the pan with foil. Is the foil just sat on top the pan lose or should the foil be sealed tightly on the spring form pan? Thank you so much for any advice you can give me on this.
Hi Kathy – if the pan fits, there’s no problem folding down the handles. Yes, unless you increase the batter, you’ll need to decrease the cook time for an 8″ pan. I haven’t tried it, but my guess would be reduce it by 1/3. The foil is just loosely covering the pan. Sounds like you’re doing great. Have fun!
What would be the time to cook in two 4 inch pans?
Thanks, sounds great!
Hi Jenny – I’m not sure all the batter will fit in two 4-inch pans. Just be sure and not fill them more than 2/3 full and start with a 10 minute cook time. Let me know how it goes 🙂
Jenny- did you do this yet? How did it turn out?
Hello,
Looks delicious! For the crushed cookies, do you keep the the middle cream or do you scrape it off and then crush?
Thank you!!
Hi Julia – I don’t usually remove the middle. You can if you prefer a less sweet crust, but it doesn’t seem to make a big difference. Enjoy!
Thank you!! Can’t wait to try it!
Can I replace the tablespoon of flour with a half tablespoon of corn starch? I want to make this for a friend who cannot have gluten. I have found gluten free chocolate sandwich cookies.
Hi Carrie – yes, that will work just fine. You can even just eliminate the flour if you’d rather.
It came out great with the corn starch. I also changed to Oreos to a gluten free version. I did mess up when adding the peanut butter. I doubled it. The cake still turned out, it was just peanutier.
What do you use for the chocolate ganache? Ca you use a chopped candy bar?
You can use a candy bar but better to use a good baking chocolate in the baking aisle, like Ghirardelli. I use Guittard wafers http://www.gygi.com/guittard-wafers-old-dutch-milk-chocolate.html
Why is this cheesecake cooking time 50 min and the others are 30? Ingredients are basically the same . Thanks for any answers to this . Looks amazing though!
Because of the addition of peanut butter 🙂
How long for an 8 inch springform pan to cook?
Hi Leanne – if your 8 inch pan fits in your pressure cooker, you may want to increase the volume by 1/2 but if you don’t mind a short cheesecake, you don’t need to. I’d probably increase the cook time 5 or 10 minutes if you increase the volume. Otherwise, you may want to decrease the cook time 5 minutes. Let me know if you try it.
Made this for Christmas Day and it was incredible! Make sure to cut the pieces small. It’s tempting to cut them larger b/c the cake is smaller, but don’t… It’s rich so a little bit will do.
Thanks Gail! A small piece is definitely all you need 🙂
Hello – I am about ready to put this in the instant pot – my question is on previous cheesecake recipes some said to put a piece of foil with a paper towel on the bottom and on top. Yours says just put the foil on top. I am using a 7 inch springform pan.
Hi Kelly – I never use paper towels when I’m making my cheesecake. You won’t need it with this recipe. Enjoy!
Hubby would like this for his birthday (he said no to cheesecake until he saw a picture of this). Would it be alright to use mini peanut butter cups (the really tiny ones smaller than a dime) instead of the chocolate chips?
Hi Cristin – I’m not sure. I’ve never tried that. It would really depend on whether they hold up when heated or if they would sort of melt into the batter causing additional moisture in the cheesecake. I’d probably just put them on top and eliminate the chocolate chips. Enjoy!
Thank you!
I just have a question, can I use a regular pressure cooker? Not an instapot pressure cooker…. ?
Also, I’m confused about your comment (in the comments) “This cheesecake needs longer because of the addition of peanut butter, so I’d try 8 to 10 minutes.”. The recipe calls for 50 minutes…. But the heart cheesecake recipe actually does say 6 minutes. What’s up with that? Is this a typo and is it actually supposed to say 5 minutes?
Hi Kimberly – yes, you can use a stove top pressure cooker. A stove top pressure cooker usually cooks at a higher psi so you may want to reduce your cook time slightly. The heart cheesecake I referred to is a little 4″ pan with a regular non-peanut butter cheesecake. This cheesecake is made in a 7 inch pan and needs 50 minutes in an electric pressure cooker like the Instant Pot.
Quick question… I am using a 6″ push pan, how long would you recommend cooking? Original recipe calls for 50 minutes for the 7″, would you think 60 min for the 6″? Please advise, I will be making one as a trial run before I make it for a Christmas party. Thanks!
Hi Amanda – others have made it in a 6″ push pan without changing the time. Just check it after 50 minutes and see if it’s cooked to your liking. Enjoy!
How long should I cook this if using 3 4-inch springform pans?
Hi Candy – I cooked my 4″ heart shaped cheesecakes for 6 minutes https://www.pressurecookingtoday.com/pressure-cooker-heart-shaped-cheesecake/. This cheesecake needs longer because of the addition of peanut butter, so I’d try 8 to 10 minutes. You’ll have more batter than will fit in 3 pans – don’t fill them more than 2/3’s full.
I’m thinking I’d rather leave the chocolate chips out, for fear of death by chocolate! I’m also thinking it won’t have an impact on the recipe?? Thoughts?
I found the answer in a post below. It works fine without the chocolate chips. Will “test” this myself tomorrow!
How long would you cook three 4″ pans? The 7″ turns out beautifully! I love this recipe and want to gift some mini cheesecakes to my neighbors! Thank you!
Thanks Pam – what a great gift. I cooked my 4″ heart shaped cheesecakes for 6 minutes https://www.pressurecookingtoday.com/pressure-cooker-heart-shaped-cheesecake/. This cheesecake needs longer because of the addition of peanut butter, so I’d try 8 to 10 minutes.
Thank you so much! I can’t wait to try it!
Can I use an 8 inch springform pan with this recipe? I’m afraid it won’t work right.
Hi Leanne – if your 8 inch pan fits in your pressure cooker, you can make it in the 8 inch pan with no problem. You may want to increase the volume by 1/2 but if you don’t mind a short cheesecake, you don’t need to. Your cook time may need to be a little longer as well.
can i use regular liquid whipping cream for the topping in place of heavy cream?
Yes, maybe use a little less so it sets up faster.
Thank you! I have some open in the frig that I didn’t want to go to waste. 🙂
what is the depth of the pan you use? all the ones I see are 2- 1/2 deep is that enough Got all the fixins just need to get the pan.
Hi Ann – that should be just fine. Mine is 2.9 inches and holds 4 cups. Enjoy!
Made this today for my husband’s birthday. I followed all the steps to a T, with the small exception of not adding chocolate chips. It seemed like too much for my taste buds. 🙂 It turned out beautifully. Very delicious, extremely rich!
Awww…I just posted above asking about leaving out the chocolate chips. I should have taken the time to read first. Thanks!
This was severely overcooked at 50 minutes. It was fully set, cracked, and browned around the edges when I removed it from the pressure cooker. I used a 6″ Push-pan, which is supposed to take a longer cooking time than the 7″ due to the greater depth. Really disappointed, and will reconsider using other recipes from this site as they obviously are not well tested.
Hi Catherine – sorry you had trouble with the recipe. This recipe was been made successfully and enjoyed by many! Did you make any changes to the recipe?
I can’t wait to make this tomorrow. It will be my first cheesecake and I want to get it right. For the Oreo crumbs, do I only use the cookie part and discard the cream in the middle or just crumble up the whole cookie? Sorry if I missed this somewhere. Thanks.
Hi Simone – I just crumbled up the whole cookie. Happy Thanksgiving – Enjoy!
Thank you!
Can I use a 6″ pan?
Hi Brenda – yes, others have used 6″ pans successfully. It may need a slightly longer cooking time. Enjoy!
I’ve made this twice now and both times mine are flatter and more dense . Why isn’t it fluffy like your picture I followed the directions. Still taste pretty good
Hi Bette – mine wasn’t fluffy either. It’s definitely a dense, rich cheesecake. Glad you enjoyed it.
Hello , can this be made without the trivet. Or is the an alternative for the cruisnart 6qt PC
Hi Juliet – you can’t cook it on the bottom of the pot but you could create balls of aluminum to raise it off the bottom. You can also buy a rack fairly inexpensively on Amazon. https://www.amazon.com/Andersons-Professional-Cooling-Heavyweight-6-Inches/dp/B000I1ZUWO/ref=as_sl_pc_as_ss_li_til?tag=barbbake-20&linkCode=w00&linkId=6d10b16e0e7c7c62363b93f2a4b3d3ea&creativeASIN=B000I1ZUWO
Hi I am going to be using an 8″ push pan do I need to adjust the ingredients and cooking time? Thank you!
Hi Christina – just be sure your pan fits in the pressure cooker. Then you’ll need to increase the volume, probably 1.5 times the ingredients and you may need to increase the cook time as well. Maybe another 10 minutes or so.
I have a 9 inch springform pan that fits snuggly in my PC, not IP brand. How can i adjust this recipe for a good size, tall ish cheesecake? Also, no sour cream mixture on top, under ganach?
Hi Beth – I haven’t tried it, but you should be able to double the ingredients and it will fit in a 9″ springform pan. You’ll need to increase the cook time, my guess would be 1.5 times. No sour cream under the ganache.
I know cheesecakes can be frozen…but do you think the ganache topping could also be frozen?
Hi Maureen – I haven’t tried it, but it should freeze just fine with the ganache on top.
Hi Barbara!
How would I modify this recipe if I do not own a pressure cooker and only an oven?
Hi Kristina – are you baking it in a 9″ springform pan or the 7″ springform pan? If you’re using a 9″, you’ll want to double the ingredients. Then you can use the baking instructions in this recipe http://www.barbarabakes.com/strawberry-cheesecake-with-an-oreo-cookie-crust/. Your cook time could be a little longer because of the addition of peanut butter. Just cook it until the middle is set.
What size Instant Pot do you use?
Hi Cynthia – I test all my recipes using 6 quart electric https://www.pressurecookingtoday.com/faq/
Hi Barbara,
I only have a 6 in push pan. How can I best adjust the time for your recipe? I’m using an instant pot pressure cooker. We have a community in Facebook and your cheesecakes are one of the most shared recipes in our page! 🙂
Mela
Thanks Mela – that’s always nice to hear. I test all of my recipes in an electric pressure cooker, often the Instant Pot. Others have made this cheesecake in a 6″ push pan without changing the time. Just check it after 50 minutes and see if it’s cooked to your liking.
Need help finding a springform pan? Where’s the best place. I’ll only use it maybe 1-2 times a year
Hi Tina – there’s an Amaon link to buy the springform pan I use at the bottom of the post. People have also been having luck buying the 7″ or 6″ pan at Michaels. Enjoy!
Thanks for the update and sharing your stove top tips. I’d love to see a picture. You can share it on PCT’s Facebook page or on Instagram and tag me 🙂
Bought all the ingredients today to make this tomorrow morning. Just got my Big Daddio 7″ cheesecake pan. Stove top PC’er here so trying the 45 min. timing… Can’t wait 🙂
Hi Gary – sounds like a good plan. Hope you love it!
Turned out fabulous! A note for others that may do this in a stove top PC. 1-1/2 cups water minimum in the bottom and 40 minutes at 15 PSI is perfect. Mine was almost bone dry at 1 cup. Wish I could post a picture of the finished cake.
Thanks Barbara.
Can your cheesecakes be made with Neufchâtel cheese rather than regular cream cheese? They all look so delicious. I, considering this one, but I already have Neufchâtel on hand.
I just made this one with Neufchatel-not a problem at all!
Could u tell me what to set my PC on to make the cheesecake ? I have a farberware 7 in 1 and it didn’t come with a recipe book. It is all preset settings. Like meat… Stew…. Rice…. Chicken….. And vegetable steam. U can’t just press high and a time. Once u press one of this settings then u can change the time. Please help me out I really want to learn to cook in it.
Hi Kim – I don’t have any experience with the Farberware, but my experience is most of the buttons cook at high pressure and the only difference is the preset time. So it probably doesn’t matter if you use meat, stew or chicken, just adjust the time and you’ll be cooking at high pressure. Enjoy!
How would you adjust this to make it on a stove top pressure cooker?
Hi Courtney – since your stove top pressure cooker cooks at a higher psi, I’d reduce the cook time about 5 minutes.
This looks wonderful and I’d love to try to this recipe, but I know my husband would not like the peanut butter. How would I adjust the recipe to leave it out?
Thank you.
Barbara has other pressure cooker cheesecake recipes including a key lime one. I suggest you look for a recipe that appeals to your family, rather than trying to adapt this one.
Can I accelerate the chill time to freezer to serve quicker?
Hi Meg – I haven’t tried it, but others said once it was cool they put it in the freezer for 30 minutes.
Trying to make this cheesecake , it calls for 1 cup crushed Oreo cookie crumbs , ??? what and where do I get this? please. I ove your lemon cheesecake.
Jackie
Hi Jacqueline – Oreo cookies are a crisp chocolate cookie with a creme center. Just buy the cookies and crush them. If you can’t buy Oreo cookies, chocolate graham cracker cookies or similar cookies would be a good substitute. Enjoy!
OH , great that is what I bought, was not sure if it s what you meant ..Again Thank you.
Jackie
i made this today and it is delicious! So moist and NO cracking on the top like baked cheesecake.
Thanks Rebecca! Pressure cooker cheesecake is the best!
Holy smokes this sounds good!
Thanks! It really tastes as good as it sounds.
Will this bake time work for most cheesecake recipes? Mine are pretty rich, heavy cream, cream cheese and ricotta.
I’d say the cook time is a little long for most cheesecakes. But it really doesn’t seem to be a problem to cook it for a shorter time, then check and see if it’s set and if not, just cook it for a little longer.
Question…. is 50 minutes the correct baking time? That seems like an awfully long time since mist pressure cooker cheesecake recipes only take 15 minutes.
Hi Lori – 50 minutes is correct. I’ve found the richer the cheesecake the longer it takes to “bake”.
Ohhhhhhhh my STARS! Does that ever look decadent and delicious. I do believe I could make Bob a cheesecake lover with this one!
I’ve said it before and I’ll say it again….you’re a genius, Barbara-and an inspiration to GET BUSY with that pressure cooker. 🙂
Aww thanks Carol! Your sweet comments always brighten my day.