How to Make PERFECT Pressure Cooker / Instant Pot Eggs
Learn the secrets of how to cook eggs in your Instant Pot, Ninja Foodi, or other brand of electric pressure cooker. I’ll help you figure out YOUR perfect cook time to get your Instant Pot eggs exactly how you like them. After a little practice, you’ll be an expert at making hard-boiled eggs, soft-boiled eggs, poached eggs, and an egg loaf in your pressure cooker.
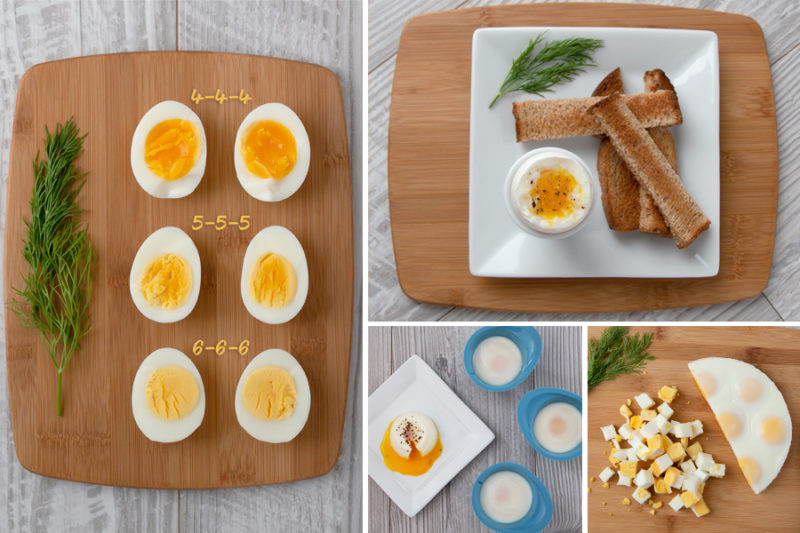
Making eggs in the pressure cooker is a GAME CHANGER! No need to watch the boiling water and, once you’ve figured out your perfect timing, you get consistent results every time. That means perfectly cooked whites, yolks exactly as you want them (with no rings), and SUPER easy to peel. (Or skip the peeling altogether with this Instant Pot egg loaf hack!)
How to Cook Eggs in the Instant Pot or Electric Pressure Cooker
One of the things I love about making eggs in the pressure cooker is that you get consistent results every time—once you figure out the timing that works for you.
Whether you use your pressure cooker or your stove top, a huge number of factors affects the timing of your eggs:
- the brand and model of pressure cooker you use
- your altitude
- how fresh the eggs are (a member of our Facebook group sells fresh eggs and says that eggs that are less than a week old are much harder to peel because the air cell inside is so small. She recommends waiting a week before pressure cooking eggs in their shell)
- size of eggs (medium, large, and jumbo eggs will have different cook times)
- the thickness and height of your trivet, silicone pans, or egg bite molds
- whether your pressure cooker is room temperature or hot from cooking something else before starting the eggs
- whether you use your eggs cold from the refrigerator or room temperature
Surprisingly, it doesn’t seem to matter much how many eggs are in the pot—you can make a single egg or more than a dozen at a time!
In order to find your perfect time, you need to start with the same conditions and just change the cook time. Start with a cold pressure cooker, use the same pots or trivets, have the eggs at the same size and temperature, and use the same amount of water and water temperature. Then just adjust the cook time up or down in 1-minute increments until you find the perfect time for you.
Pressure Cooker / Instant Pot Hard-boiled Eggs
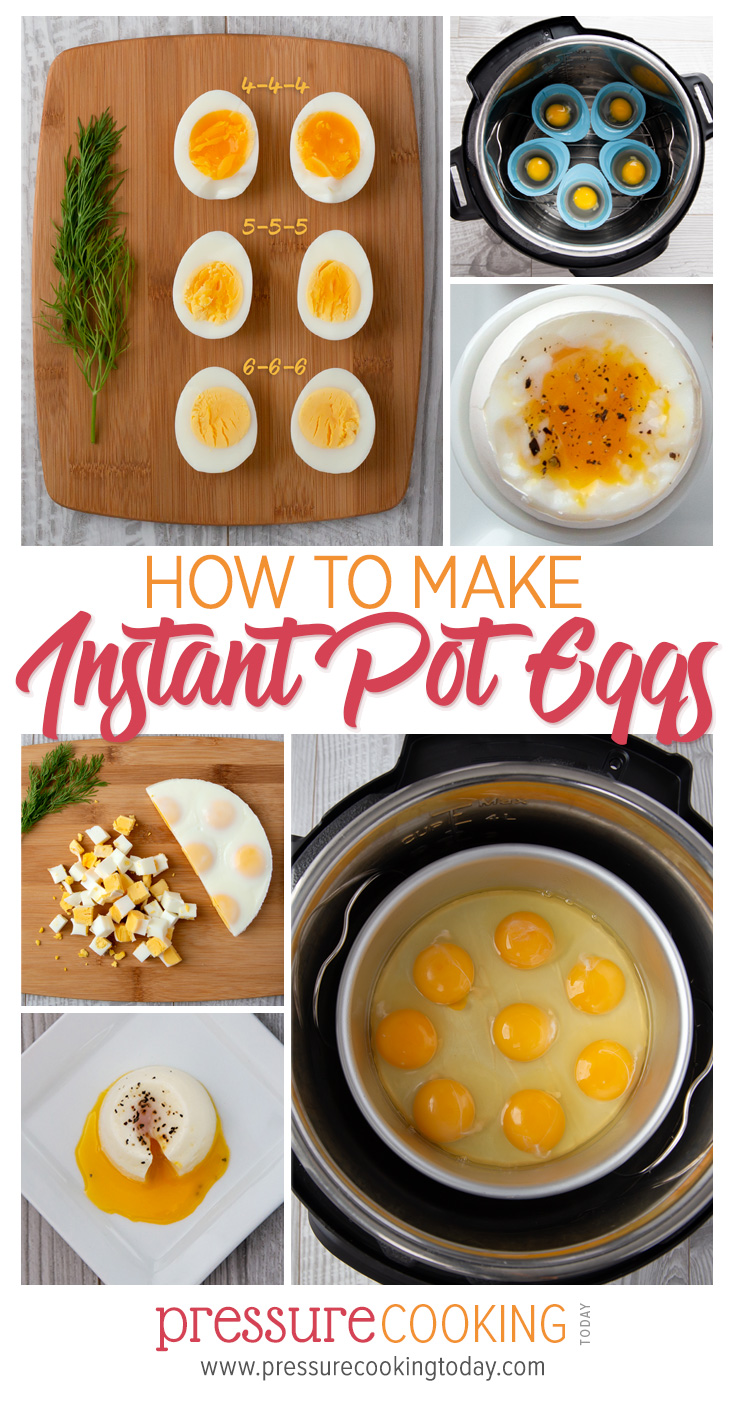
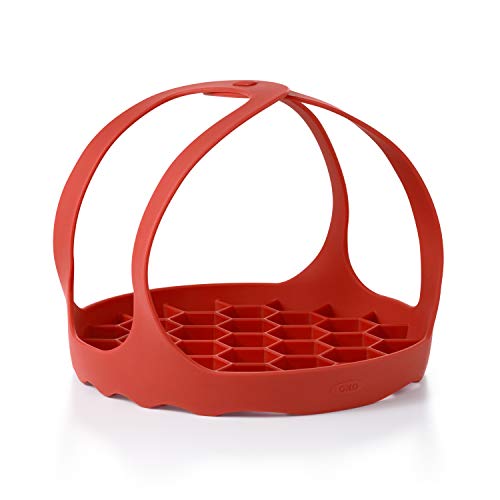
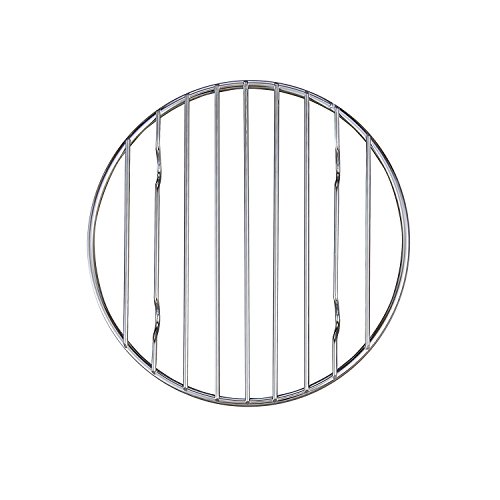
To make hard-boiled eggs, at my altitude (about 5,000 ft), I use cold, store-bought eggs right from the fridge and 1 cup cold water in the bottom of the pressure cooking pot. I place the eggs on either my metal Oxo Steamer Basket or my silicone Oxo Egg Rack. The 6-6-6 method works great for me. After pressure cooking, I use my Mini-Mitts to grab the eggs and immediately transfer them directly to the ice water bath.
(In rare instances, one of my hard-boiled eggs may crack, but I think it has more to do with the egg having a hairline crack before I pressure cooked it. If you’re having trouble with cracked eggs, you can try cooking them inside silicone muffin liners to keep them from touching each other in the pot.)
For more details, read my in-depth tutorial on Instant Pot / Pressure Cooker Hard Boiled Eggs here.
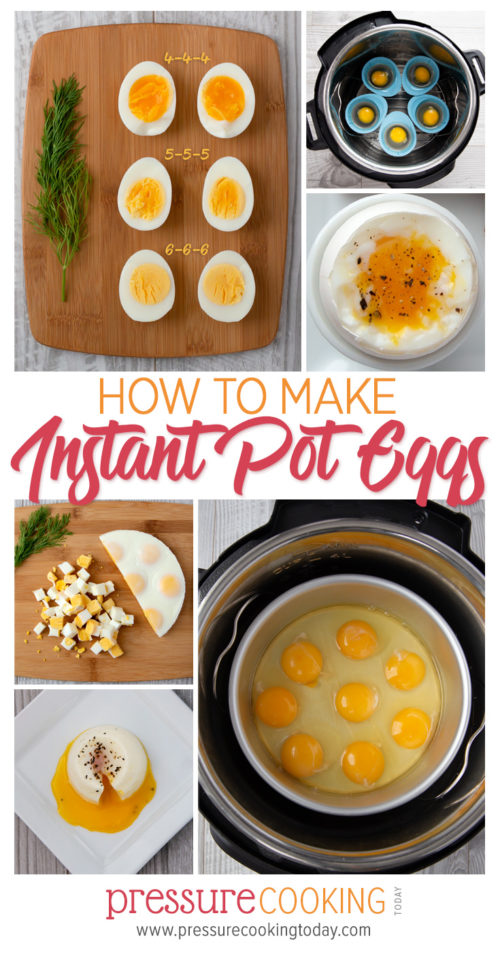
What is the 6-6-6 method for making pressure cooker / Instant Pot hard-boiled eggs?
Pressure cooking fans can have strong opinions about hard-boiled eggs! Some people swear by the 6-6-6 method, other people prefer 5-5-5. But what do those numbers stand for?
The 6-6-6 method is simply 6 minutes at high pressure, 6 minutes natural pressure release (then use a quick release to get rid of any remaining pressure), and 6 minutes in an ice bath.
People who prefer a softer egg use the 4-4-4 or 5-5-5 method, which follows the same High Pressure-Natural Release-Ice Bath formula.
I firmly believe there’s no one right way to pressure cook; 6-6-6 and 5-5-5 are common methods that get good results, so I’d start with those, but ultimately, use whatever gets you the results you’re happy with.
Pressure Cooker / Instant Pot Soft-boiled Eggs
When you’re eating eggs with ramen or toast “soldiers,” you just need a good soft-boiled egg. However, soft boiled eggs can be tricky to cook—the egg needs to reach a high enough temperature to cook the white but stay low enough that the yolk doesn’t cook.
For me, the perfect formula is to place the Oxo Egg Rack on the bottom of the pressure cooking pot and pour in 1 cup of cool water. Place up to 8 eggs (cold) on top of the egg rack. Set the cook time for 5 minutes, then use a quick pressure release. Immediately transfer the eggs to an ice water bath until cool to the touch.
The 5-minute cook time gets you a soft white that’s cooked all the way through. The yolk is just barely starting to cook through at the edges but is still liquid and perfect for dipping. If you like even softer, wet whites, use a 4-minute cook time.
Note that this timing varies based on the type of trivet you use. If you’re placing the eggs in a metal steamer basket, you may need to add an additional minute or two. Experiment until you find the time that works for you!
Pressure Cooker / Instant Pot Poached Eggs
If you want the yolky-goodness of a soft-boiled egg, but don’t want to peel it, try this awesome trick for making poached eggs in your Instant Pot.
My friend Genene often cooks herself a single poached egg in the morning. Her timing works out perfectly for me! She uses these silicone egg poaching cups. I bought slightly different silicone cups at my local grocery store. I’m sure you could also use silicone baking cups.
Generously spray the silicone egg cups with nonstick cooking spray. Crack 1 egg into each silicone egg cup. Place a trivet in the bottom of the pressure cooking pot, then add 1 cup cool water. Balance the filled egg cups on top of the trivet. Set the cook time for 5 minutes, then use a quick pressure release. Immediately transfer the poached eggs to a wire rack to cool.
Pressure Cooker / Instant Pot Egg Loaf
This egg loaf Instant Pot hack lets you cook the eggs cracked so you can skip the ice bath and peeling! This technique comes in handy if you’re making something like my Egg Salad Sandwiches (page 69 in the Electric Pressure Cooker Cookbook).
The #1 thing to know about making Pressure Cooker / Instant Pot Egg Loaf: the pan you use makes a HUGE difference in the cook time. The original post in the Instant Pot community cooked the eggs in a pyrex bowl. Since some PCT readers avoid using pyrex in their pressure cookers, I wanted to figure out the timing using another pan.
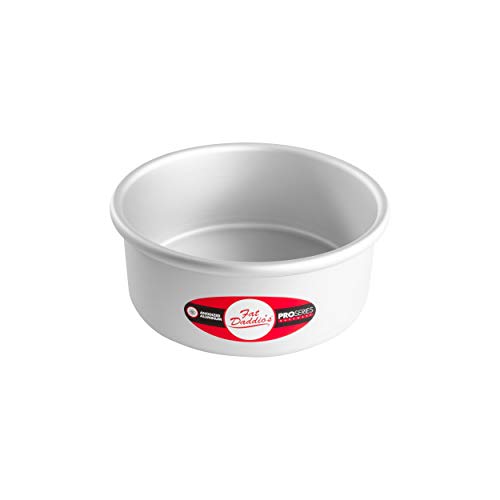
Initially I tried making my egg loaf in a silicone bowl, but after 20+ minutes of pressure cooking, the eggs were still unevenly cooked. Then I moved to my trusty 7×3-inch round cake pan, and it made all the difference!
I like a traditional hard boiled egg, with a pale yellow yolk and firm whites. So, for me, the magic egg loaf number was eight: 8 eggs, 8 minutes at High Pressure, and an 8-minute natural pressure release. If you prefer your yolks a little more orange, experiment with taking a minute off the cook time.
To make the egg loaf easy to remove from the pan, simply line the bottom of the pan with parchment paper and don’t forget the nonstick cooking spray.

Easy-Release Hard-boiled Egg Loaf
This egg loaf Instant Pot hack lets you cook the eggs cracked so you can skip the ice bath and peeling!
Ingredients
- 8 eggs, refrigerated
Instructions
- Place a trivet inside the pressure cooking pot, then add 1 cup water.
- Generously coat a 7x3-inch cake pan with nonstick cooking spray. Be sure to spread the spray into the crease where the edge meets the sides of the pan.
- Cut a piece of parchment paper to size and place inside the bottom of the cake pan.
- Crack eggs inside the cake pan.
- Center the pan on the sling, and use the sling to carefully lower the pan onto the trivet inside the pressure cooking pot.
- Lock lid in place and set the cook time for 8 minutes. When the cook time ends, allow the pressure to release naturally for 8 minutes, then use a quick pressure release.
- Remove the lid and use the sling to remove the cake pan from the pressure cooking pot.
- To remove the egg loaf from the pan, run a knife or spatula around the edges of the pan to loosen the egg loaf. Invert a plate or cutting board on top of the cake pan. Press them together and flip both of them over. The egg loaf should slide right out on top of the cutting board. Remove the parchment paper.
Recommended Products
As an Amazon Associate and member of other affiliate programs, I earn from qualifying purchases.
Nutrition Information:
Yield: 8 Serving Size: 1 eggAmount Per Serving: Calories: 72Total Fat: 5gSaturated Fat: 2gTrans Fat: 0gUnsaturated Fat: 3gCholesterol: 186mgSodium: 71mgCarbohydrates: 0gFiber: 0gSugar: 0gProtein: 6g
Nutrition information is calculated by Nutritionix and may not always be accurate.
What’s your favorite way to eat your eggs? What timing works for you and your pressure cooker? Let me know in the comments!
More Pressure Cooker / Instant Pot Egg Recipes You’ll Love
Instant Pot Egg Bites (aka Pressure Cooker Egg Muffins)
I’ve been cooking egg bites in the pressure cooker for years and years—before pressure cooking silicone accessories, before they even became known as egg bites! (I called them Pressure Cooker Egg Muffins.) They’re still a favorite grab-and-go breakfast at our house!
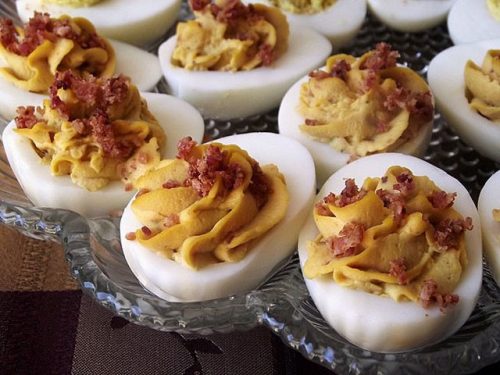
Instant Pot Deviled Eggs
Deviled eggs are a classic appetizer, and Carol, another of my pressure cooking friends, has given me two irresistible versions of pressure cooker deviled eggs: Zesty Jalepeno-Mustard Deviled Eggs and Bacon Barbecue Deviled Eggs.
Crustless Meat Lover’s Quiche (Frittata)
A crustless quiche loaded with ham, bacon, sausage and cheese that “bakes” up light and fluffy in the pressure cooker. While it has a longer cook time, it’s not hands-on time and you don’t have to worry about your quiche burning in the oven while you’re tending to other things!
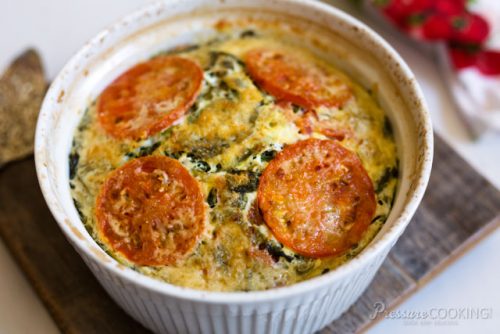
Pressure Cooker Crustless Tomato Spinach Quiche (Instant Pot Frittata)
Tomato spinach quiche made in a pressure cooker is light, fluffy and crustless, making this Instant Pot quiche recipe a delicious and healthy breakfast or brunch. This crustless quiche is also meatless, so it is perfect for vegetarian and gluten free diets.
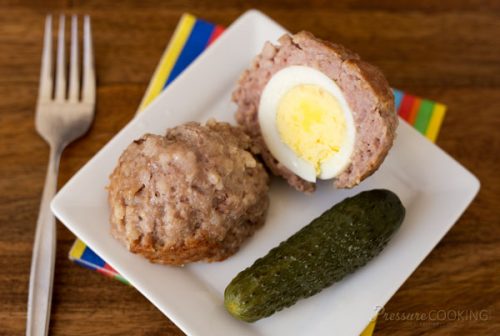
Healthier Pressure Cooker Scotch Eggs
Use your perfect pressure cooker hard boiled eggs to make these healthier Scotch eggs in your Instant Pot. You skip the calories of breading and deep frying, but you get the full sausage-and-eggs flavor of a traditional Scotch egg.
Pin It:







I’ve been making hard boiled eggs in my IP-Duo Evo Plus using 5-5-5 timing with the Oxo egg rack. 5 minutes under pressure using 1 cup of water, 5 minutes NPR then release remaining pressure, and 5 minutes in water with ice cubes. That’s given me perfect hard boiled eggs.
However today I wanted to make soft boiled eggs – where the white was completely cooked but the yellow was fairly runny. I used 5 minutes pressure cooking time, 5 minutes QPR (no NPR time) and 5 minutes in water with ice. Result were eggs barely less cooked than hard boiled eggs were. Clearly I need to go back to the drawing board and I understand that. As Barbara notes, “… you get consistent results every time—once you figure out the timing that works for you.” Eggs are inexpensive. Maybe I’ll buy a dozen or even two dozen eggs and experiment. We love deviled eggs so there will be a use for the results of our experiment.
Thanks for sharing your experiences Sigrid!
I never post, but I had to today. Making hard cooked eggs in an instant pot seemed like total overkill. Then I got an accessory kit for my IP and decided to give it a try. OMG! Why has no one ever told me how amazingly easy eggs cooked in a pressure cooker would be to peel?!?!! I love hard cooked eggs but HATE peeling them. I did 5 mints high pressure (IP took 6.5 min. to come to pressure), then I got distracted reading more recipes, so they sat for 8 min. before I did a quick release and put them in ice water for 5 min. Insides are PERFECT! I’m never going back to boiling pots of water.
Thanks for sharing Brigid – they really do peel so much easier!
You need to change your soft boiled egg instructions. 5 minutes followed by a quick release leaves the eggs almost completely uncooked.
That time works for most. You’ll need to find out what works for you. Factors that can change the cook time – altitude, cooking the eggs in a silicone basket, if you used your pressure cooker immediately before cooking the eggs so the pressure cooker is still warm, size of the eggs, whether they were room temperature or refrigerated, etc.
I’ve done the hard-boiled eggs, using the 6-6-6 method and have been fairly successful. Poached eggs are a different animal. I’ve made them the old fashioned way and now have one of those microwave poached eggs maker. Love the ease and clean-up of using a microwave. I’ll have poached eggs ready, in 45 seconds, using my microwave method.
I use a stovetop pressure cooker, and read somewhere that low pressure (~12 psi – same as electric pressure cooker) is better for cooking eggs in the shell. I live at 6000 feet. I put a cup of water in the PC and heat to boiling. Then put eggs in the steamer basket and close the lid. Vent open until steam comes out forcefully, then close vent. 8 minutes at 12 psi pressure, then natural release 5 minutes, then ice water bath.
Starting the water to boil before putting in the eggs allows me to standardize whether to use my induction cooktop or gas. (Otherwise, the induction cooktop heats faster and alters my timing.)
Never a green ring.
Hi to all. Is anyone using a 3qt mini IP for eggs? And if so, any suggestions regarding time or temp would be helpful. I do have a small cake pan that fits the pot, so maybe I will just go ahead and try some eggs myself. (Love the mini BTW. Great for two. )
Thanks so much.
We just tested an egg loaf in our mini tonight. We used a 6-inch aluminium cake pan that fits, it’s a little tight but there’s still space around it. We used 6 eggs and cooked it for 8 minutes with a 8 minute natural release. The eggs were cooked through, but the yolks started to gray just a little bit on the outer edge. If I were to test it again, I’d probably try using a 4 minute natural release. If there was still graying, I’d try a 7 minute cook time.
I hope this helps! Let me know if you try it and what works for you! We love our mini too! 🙂
I have silicone egg poaching cups. I am having a Dickens of a time making poached egg for eggs Benedict. You say 5 min others say 1 min and 1 min rest and then release pressure. Others say 3 or 4 minutes. I have an 8 quart duo80 and 1 min is iffy in that if I do 1 min and leave it even 30 seconds longer before releasing the pressure, some are perfect and some hard cooked. If I leave them in the pot without a lid while I’m stirring the hollandaise they continue to cook and I’m screwed. Lol. We live in NorCal too at 1000 ft elevation. Also, I do my hard cooked eggs on low pressure for 6 min and then 6 min wait and then release pressure and place in ice bath. They’re perfect and yummy when eaten immediately, but the next day and day after, the yolks have started to turn green around the edges and yolks arent as creamy and whites become rubbery. I do use farm fresh eggs, duck and chicken which are days to no more than a week old. Help!
Hi Karen – the 8 quart requires more liquid to come to pressure so it takes longer to come to pressure so you’ll need to reduce your cook time. You could try 0 minutes at pressure and a 1 minute natural release for your poached eggs. I would also reduce your cook time for your hard cooked eggs 5 5 5 might work well for you.
Barbara, your article is so beautifully photographed.
Egg loaf! So clever! For the egg loaf, would the timing change if using 12 eggs?
Thanks Rita! I haven’t tried 12 eggs, but assume your cook time will be a minute or two longer. If you try it let me know.
I tried a dozen large eggs in an 8-inch pan for 9 minutes + an 8-minute Natural Release. The slightly larger pan probably affected the cooking time because the yolks had the dreaded green ring and were on the dry side. They made an OK egg salad, so nothing was wasted. The next time I will probably cook them for 7 minutes. My preference for egg salad is generally for yolks that are just slightly underdone.
I put the egg loaf in a largish bowl and used my pastry blender to quickly chop them. It’s a huge time saver. Mine is similar to the one below. If anyone would like to order one, click on “Shop” at the top of Barbara’s site. You will find it under Best Baking Accessories and Supplies:
https://www.amazon.com/dp/B000QJE48O/?cv_ct_id=amzn1.idea.1CJZ3PQ3KBVD8&cv_ct_pg=storefront&cv_ct_wn=aip-storefront&ref=exp_cov_pressurecookingtoday_lv_dp_vv_d
Thanks for the update Rita! Such a great tip to chop the egg loaf with a pastry blender. I’ll have to give that a try.
I have a 6-quart Instant Pot and we live in Northern California at 2500 feet. I use the 5-5-5 method, works perfectly every time, although I often leave my eggs in the ice bath longer than 5 minutes. It’s not necessary to cool them longer but if you don’t take them out of the ice bath after 5 minutes, there’s no harm at all.
Thanks for sharing Beth! I’ll often leave them in the ice bath longer too.
I do the 5:5:5 method and it seems to work well for me. I always cook an extra egg or 2 if making deviled eggs because it never seems to fail one will have a hairline crack that I didn’t notice that gives me a SURPRISE when I open the lid…that’s OK…perfect snack for the cook. Ever since making hard boiled eggs in the pressure cooker, I’ll never go back to using the stove top again. I agree with you about using the metal pan for the egg loaf…that’s what I use too. I always cook them that way when making egg salad.
I love that silicone egg holder (the yellow one)…I use mine a lot. I just used it a couple weeks ago when I made the Jalapeno Mustard Deviled Eggs for our Super Bowl party-they were gone in no time at all.
SO many great ideas for eggs here, Barbara,,,,I’ve gotta make your egg bites. We’re in a breakfast “rut” these days….I think those just might be a game changer. 🙂
Thanks so much Carol for gifting me the OXO egg cooker and sling. They really are great. I think you’re the queen of deviled eggs.
So much great information here! I just recently tried the 5-5-5 method in my 6-quart Instant Pot and it worked perfectly. My eggs looked just like your 6-6-6 eggs. My elevation is about 300 feet, though, so I’m much lower than your 5,000 feet. That’s probably why the 5-5-5 method worked for me.
My daughters have 8-quart Instant Pots and the 5-5-5 method produces over-cooked eggs. It takes a bit longer for the 8-quart pots to get to pressure and that means extra cooking time. They find that the 5-5 method works with the 8-quart pots. 5 minutes at high pressure, then a quick release, and 5 minutes in ice water.
I’m looking forward to trying your poached eggs and Scotch eggs. Thanks for the great post!
Thanks Kath! I appreciate you sharing the additional information!