
Instant Pot Pro Plus Review
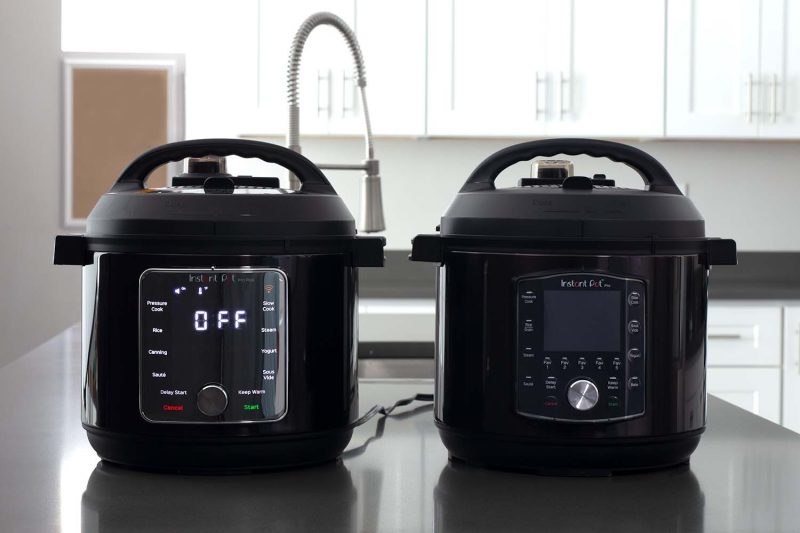
The Instant Pot Pro Plus is new for 2021 and is a mash-up of many people’s favorite models, offering a Max pressure setting and Wifi connectivity, along with a large shiny touch screen and black stainless exterior.
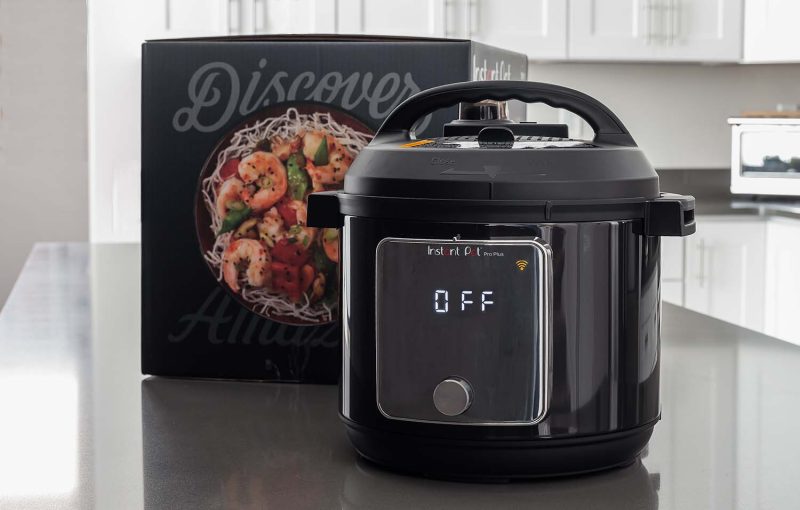
The new Instant Pot Pro Plus is here! We’ve been cooking in it for about two weeks now, and we’ll tell you everything you need to know about this tech-y spin on our favorite Instant Pot Pro.
Since this is a really long, thorough review, click the links below to jump to the sections you’re interested in:
- What is the Instant Pot Pro Plus?
- Instant Pot Pro Plus Pros and Cons
- How to cook with the Instant Pot Pro Plus
- How to Use the Cooking Functions
- Canning in the Instant Pot Pro Plus
- Warranty Information
- Specs for the Instant Pot Pro Plus
- What comes with the Instant Pot Pro Plus?
- What do the Instant Pot Pro Plus error codes mean?
Bottom Line: If you loved the Instant Pot Smart Wi-fi for its connectivity or the Instant Pot Max for canning, you’ll really love the Instant Pot Pro Plus, which makes serious improvements to both of those models.
WHAT IS THE INSTANT POT PRO PLUS?
The Instant Pot Pro Plus is the latest model of electric pressure cooker made by Instant Pot. It is currently only available in a 6-quart size.
This is the only Pro model that offers Wi-Fi connectivity and a touch screen. It is also the only Instant Pot model that cooks at 15psi, the recommended temperature for canning.
PROS AND CONS ABOUT THE INSTANT POT PRO PLUS
The Instant Pot Pro Plus has kept many of my favorite features from the Max, Smart, and Pro models. However, there’s still a few things you should know before you buy:
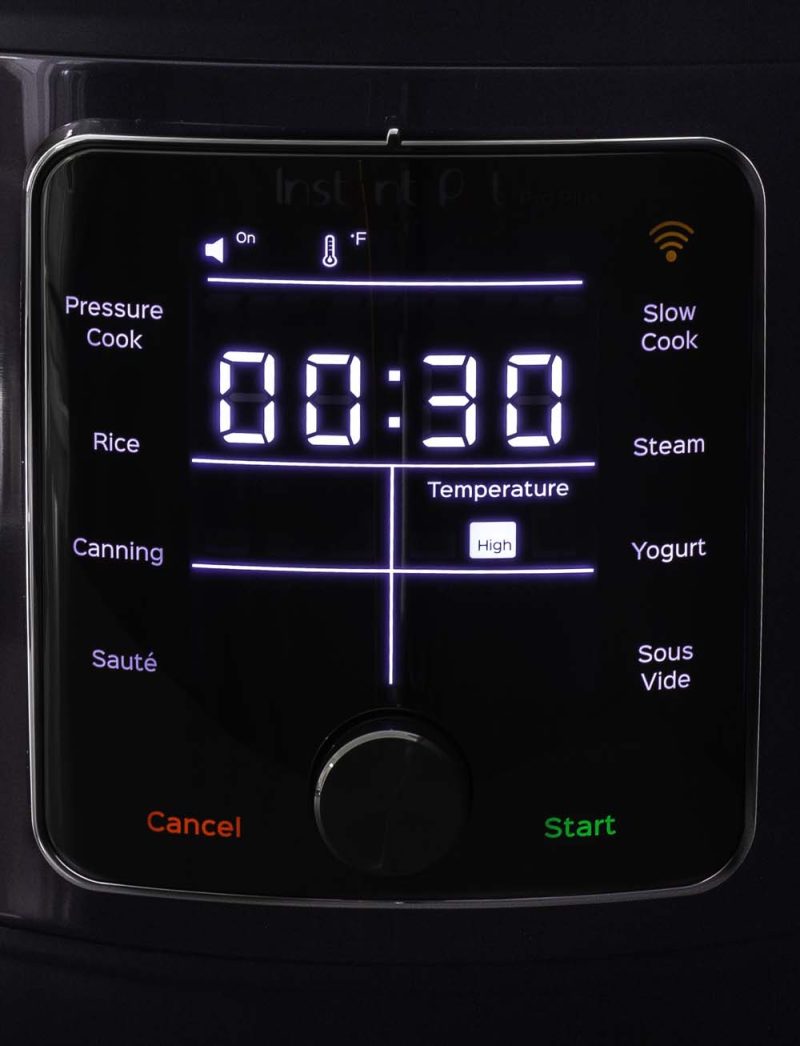
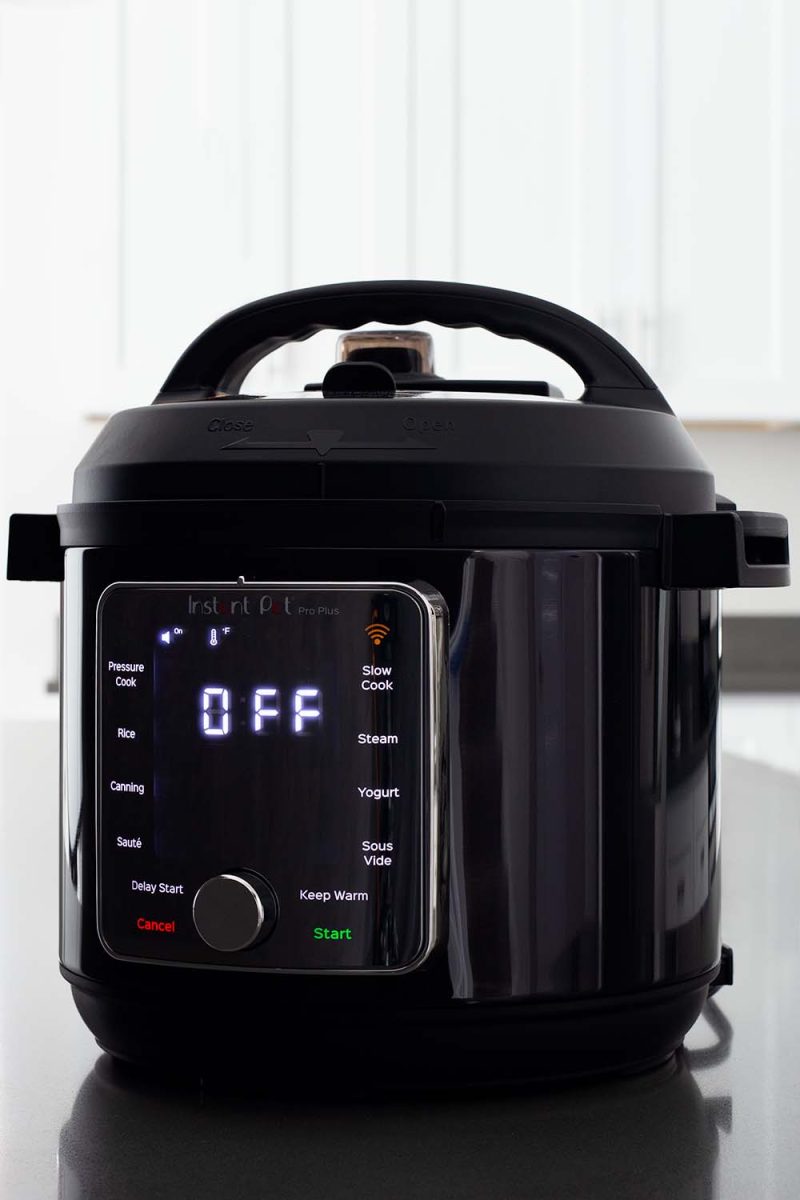
NEW Touch-Screen DISPLAY
The control panel is quite large and appears to be made of the same durable glass as an iPhone.
Once plugged in, touching anywhere on the screen “wakes up” the panel and the familiar left and right function options appear, with the time, pressure level, and other information in the center.
🟢 Pros: The large control panel is really easy to read. I like the pressure indicator light that makes it clear the lid is locked in place and cannot be removed. You can turn the sound off and on right from the touch screen (just press and hold the little speaker icon for 2 seconds to toggle between off and on).
And, like with the Pro and Evo Plus, I really love the progress bars for the Pre-heating and Cooking modes—it’s really helpful when you’re impatiently waiting for dinner.
🔴 Cons: The touchscreen/knob combo can be a little confusing at first. It’s not immediately intuitive when to use the knob and when to touch the screen, especially if you’ve owned a previous model with a knob.
Unlike every previous model with a knob, which you’d spin to toggle between the settings and press to select, the center dial on the Pro Plus is only used to adjust the time and temperature up and down—everything else is handled by the touch screen.
In practice, that looks like touching the screen to select Pressure Cook, touching the minutes section of the screen to tell it you want to change the cook time, then grabbing the knob and spinning it up or down until you reach the right time.
I would have preferred a simple [+] and [-] area that allows the whole display to be touch screen controlled.
💡 After you press Start, you can make changes to the cook time, temperature, and pressure level, you just have to press Start again to resume the cooking process. If you fail to press Start, it reverts to the previous settings.

Cooking via the Instant Pot App
Barbara and I have tested out the previous two versions of the Instant Pot Smart, which have connected via Bluetooth and Wi-Fi.
It was a cool feature, but it was never a must-have for us, since we tend to be in the kitchen while we cook.
However, the Pro Plus offers an improved connected experience, and there are aspects of the app we prefer to the touch-screen control panel.
📲 Technical Info: You can download the Instant Pot app (officially named Instant Brands Connect) from the Apple Store or the Google Play Store.
Most phones meet these specs, but just in case: You need an Android 5.0 or later and iOS 12.0 or later.
Also, you can only connect via a 2.4GHz WiFi network. You’ll need to enter your home Wifi network name and password, so make sure to have this information handy.
🟢 Pros: The app is fairly intuitive to use and easy to set up. The user manual (pages 16–17) and the app itself make it really easy to connect your Instant Pot to your home Wi-Fi.
Your phone will need to be near the Pro Plus, which will need to be plugged in and not cooking when you connect.
To connect:
- Open the app, select Kitchen, then choose Add an Appliance.
- Select Instant Pot Pro Plus from the appliance list.
- Follow the instructions on the app to pair.
The app knows whether the lid is on or off. If the lid is locked in place correctly, you can start the pressure cooking cycle from anywhere—your phone doesn’t have to be on your home Wi-Fi to start it.
With the app, you can search for a recipe and it will walk you through the process step-by-step.
🟡 Pro AND Con: The app gives you a lot more control over the cooking process. When using the phone, it is MUCH easier to allow the pressure to release naturally for a specified number of minutes, then finish with a quick pressure release. At this point, I prefer to use the app for pressure releases, but sometimes it’s annoying to have to know where my phone is when it’s time to release the pressure.
🔴 Con: There’s a limit to how much you can use this feature. For instance, it would be difficult to put in the pressure cooker in the morning and start dinner on your way home from work. Meat simply can’t sit on the counter that long and grains would absorb the water necessary to cook them.
In practice, I haven’t figured out how to work the connected cooking effectively into my routine.
The newer app doesn’t have as many recipes as previous versions of the app. For instance, at this writing, there’s only one Canning recipe on the app and limited recipes for other functions.
🗓️ There’s lots more to say on this, so come back in a week or two for a separate post to walk you through the whole process.
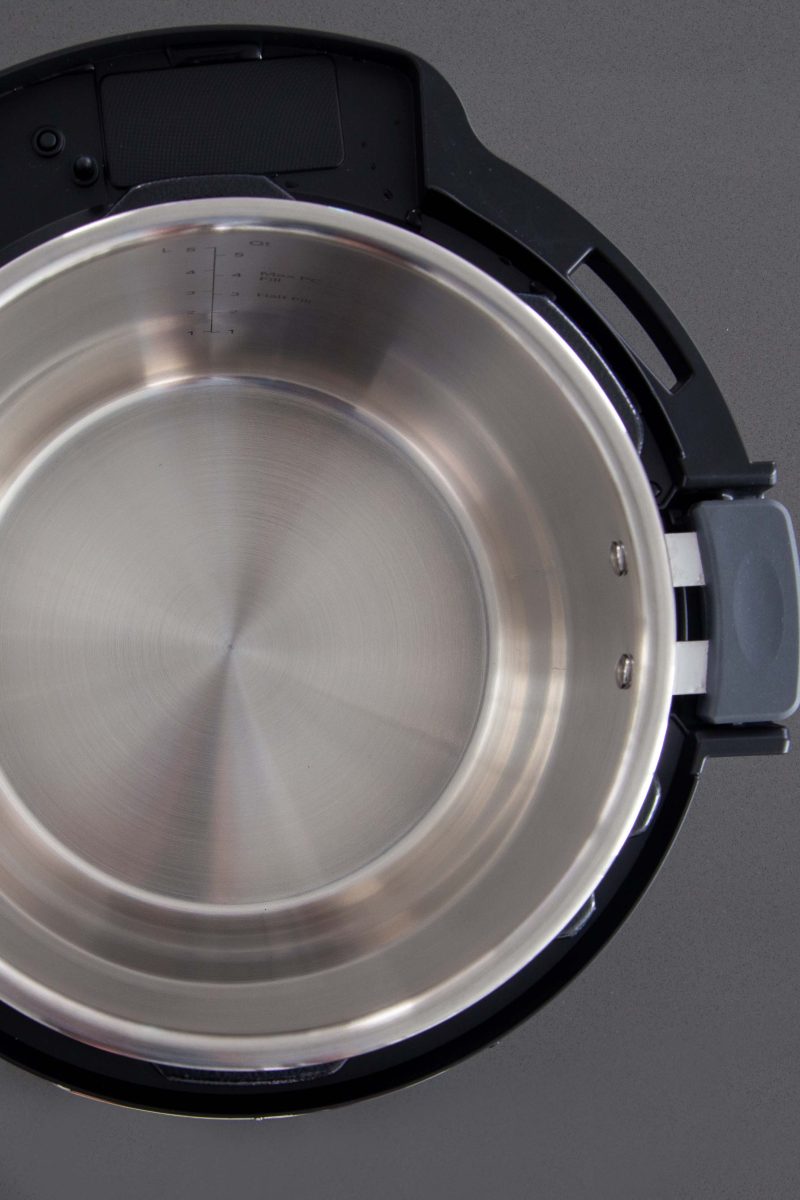
FLAT-BOTTOM INNER COOKING POT
🟢 Pros: The Pro Plus’s stainless steel cooking pot has a flat bottom and can transfer to the oven up to 400°F. It works on electric, ceramic, gas, and induction cooktops.
(I like using the pot on the stovetop for cooking big batches of pasta or rewarming foods.)
It also has handles, which lock the cooking pot in place inside the pressure cooker, so it doesn’t move while you’re stirring. The handles also make it much easier to remove the pot from the pressure cooker housing.
🔴 Cons: None. The updated cooking pot is better in every single way.
Expanded Pressure and Venting Options
Just like the Max, you can select from Low (5.8 to 7.2psi), High (10.2 to 11.6psi), and Max (15psi) pressure options.
The Pro Plus also has Natural, Pulse, and Quick pressure release options. The Pulse option releases the pressure in short bursts of steam every 15 seconds. The Quick release has been changed a bit so it now releases a quick puff of steam, locks again, then releases a steady column.
Remember that cooking at high pressure means the food cooks at higher temperatures, so you may need to reduce your cook times if you choose to use a higher pressure level than the recipe calls for like Max.
You also have a NutriBoost option you can select, if you like. This setting releases puffs of steam periodically during the last 15 minutes of pressure cooking. It’s not quite a pressure release—more to simulate boiling and stirring in the pot.
Do NOT use NutriBoost for starchy or foamy foods like pasta or oatmeal where it can spatter and risk clogging up the float valve.
🟡 Pro and Con: While these features are nice, you’ll likely need to experiment with them on your own. The vast majority of Instant Pot recipes are written at High Pressure and use Natural and Quick releases.
If you’re fine experimenting
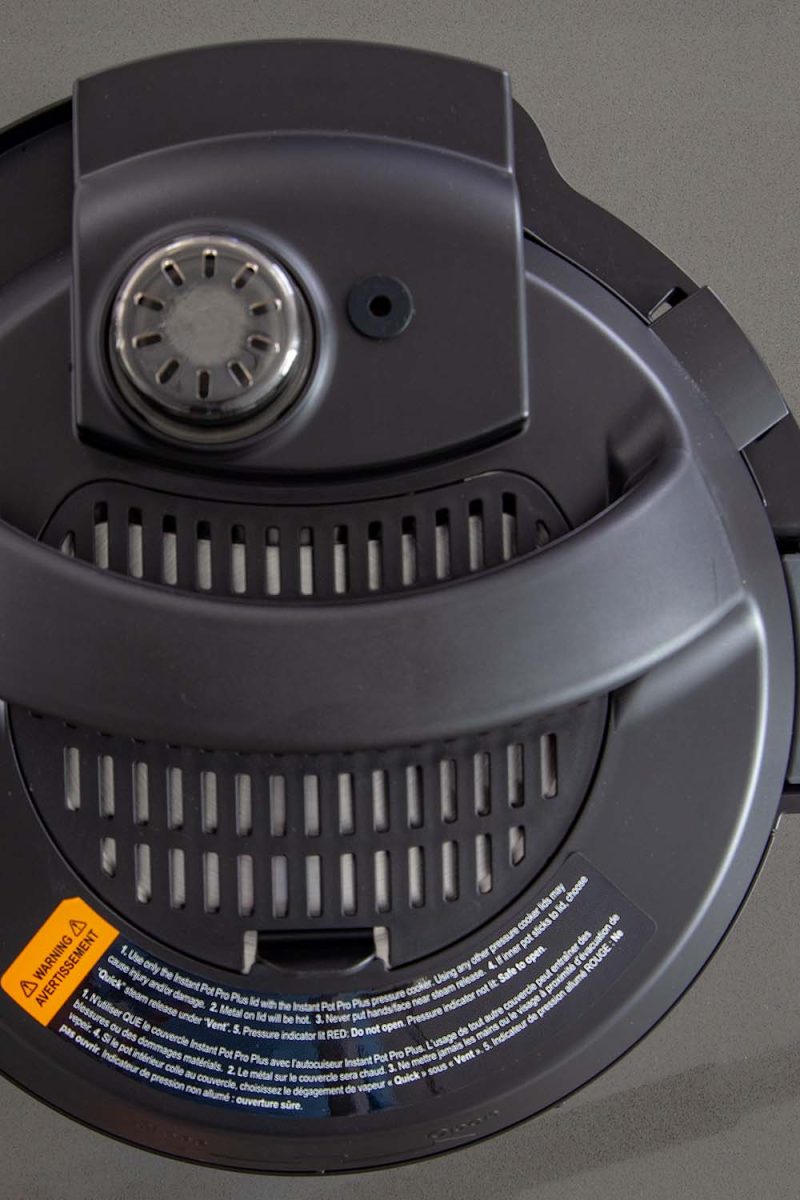
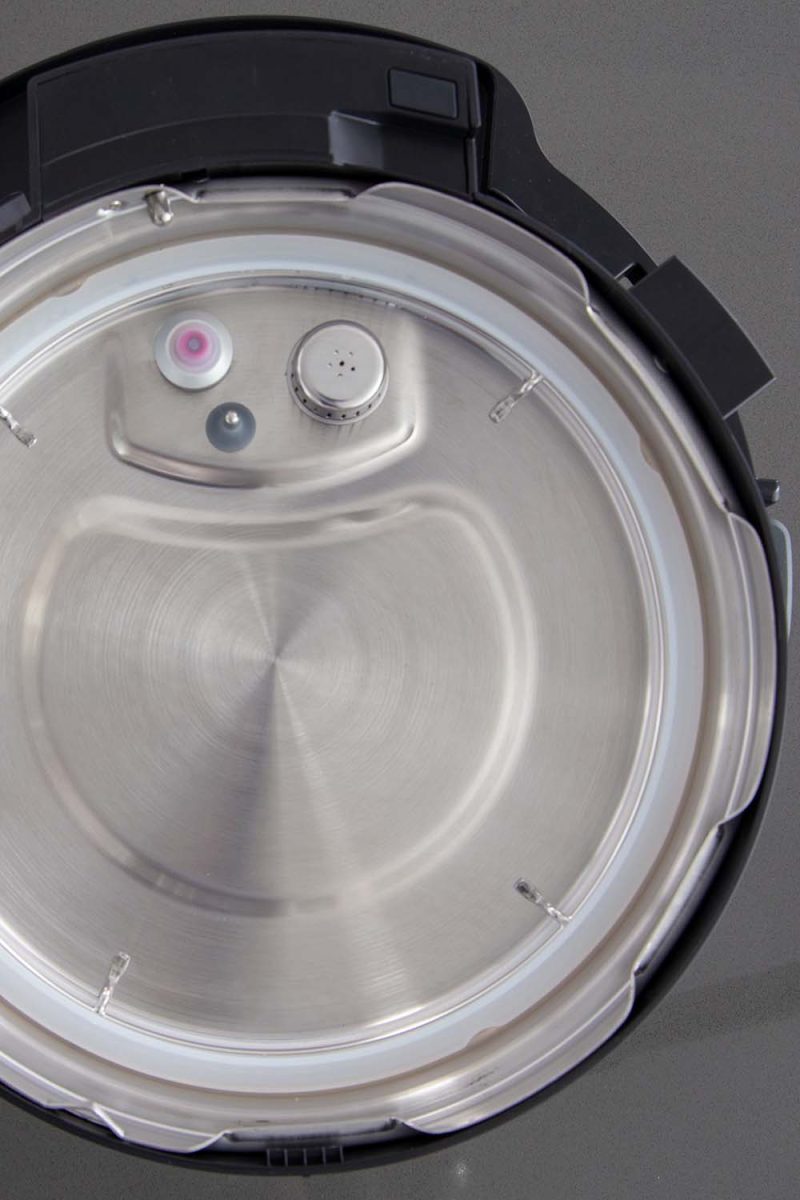
QUICK-VENTING PRESSURE COOKING LID
🟢 Pros: The Instant Pot Pro Plus lid is very similar to the Pro’s lid, which is 100% my favorite pressure cooking lid.
The lid has a cover over the steam release valve that makes the pressure release more gently. Every time you lock the lid in place, it automatically returns to the Sealed position, so you have one less thing to remember.
🔴 Cons: Not necessarily a con, but be aware that the Pro Plus has a little black silicone cover that goes over the float valve, so you cannot directly see when the float valve rises up and seals.
You’ll need to carefully remove this black silicone cover along with the mini gasket when you wash your float valve, so be careful not to lose either of these pieces.
Simplified Cooking Functions
While the manual calls them “Smart Programs,” these are the basic cooking Instant functions.
While the Pro has similar main categories, it also had several preprogrammed subcategories (for example, the Pro’s pressure cook setting has 8 subcategories that included Pasta, Chicken, and Beans).
Since most Instant Pot recipes use a custom cook time, I really prefer the simplified main-categories-only set-up on the Pro Plus.
There are eight main cooking functions on the Pro Plus:
- Pressure Cook
- Rice
- Canning (keep reading for more details)
- Sauté
- Slow Cook
- Steam
- Yogurt
- Sous Vide
⚠️ As always, remember that the cooking functions just run PRESET COOK TIMES based on averages.
They do not know what’s in your pot and cannot guarantee that your food will be cooked through when the preset time finishes.
Always use an instant-read thermometer to check for doneness, and add more time if necessary.

HOW TO PRESSURE COOK WITH THE INSTANT POT PRO PLUS
The recipes on Pressure Cooking Today cook at High Pressure. Here’s how to make our recipes in the Pro Plus:
- Touch the Pressure Cook function, then touch the minutes portion of the time display.
- Use the dial to select your desired cook time.
- Check your pressure release options match what was called for in the recipe.
- If the recipe instructions call for you to “allow the pressure to release manually for # minutes, then finish with a pressure release,” make sure the natural release setting is chosen. After 5 minutes, touch the Quick Release button and press Start again.
- Press the Start button, and watch the magic happen!
HOW TO USE THE COOKING FUNCTIONS ON THE INSTANT POT PRO PLUS
The user manual for the Pro Plus has been updated and is incredibly thorough this time around.
The instructions for pressure cooking, canning, making yogurt, and slow cooking are detailed and walk you through every step of the process.
(As someone who has struggled through a lot of Instant Pot manuals over the year, this new design and clear phrasing is such a major step up to new cooks.)
See the following pages in the Instant Pot Pro Plus user manual for detailed instructions:
- Canning: pages 33-34
- Slow Cook: page 37
- Yogurt: pages 39-41
- Sous Vide: pages 42-43
Quick Word about Canning in the Instant Pot Pro Plus
OK, canning in a pressure cooker is a hot topic in many pressure cooking and Instant Pot groups.
Officially, the USDA has not approved any electric pressure cooker for home canning, including the Instant Pot Pro Plus.
However, ever since the Instant Pot Max came out, some people have been using the Max pressure setting to can with great results. Others have been more cautious.
The same principle will apply here with the Pro Plus. Do what feels comfortable for you!
WARNING: Instant Pot cautions all users to avoid using the canning function at altitudes above 6600 feet.
Note: I’ve checked in with my contact at Instant Pot to get more information about the testing they’ve done with canning in the Pro Plus, and I’ll update this section when I hear back from them.
WARRANTY
The Instant Pot Pro Plus has a 1-year limited warranty. They have great customer service (I used it with a problem with my Evo), and they were quick to respond and helped me get the solution I needed.
You can reach Instant Pot Customer Service at support@instanthome.com or 1-800-828-7280.
Don’t forget to register within 30 days of purchase to be eligible!
WHAT ARE THE SPECS FOR THE INSTANT POT PRO PLUS PRESSURE COOKER?
The 6-quart Pro is 1200 watts, 15.8 pounds, and 13.2″ L × 13″ W × 12.7″ H.
When you’re measuring, make sure to have adequate overhead clearance to ensure the steam can release without any cupboards or light fixtures above it.
Like the Pro, the Pro Plus’s manual specifies the minimum cooking liquids for the 6-quart model is 1.5 cups of liquid unless otherwise specified in the recipe. (However, in our testing, we have not had any issues making recipes with only 1 cup or less of liquids.)
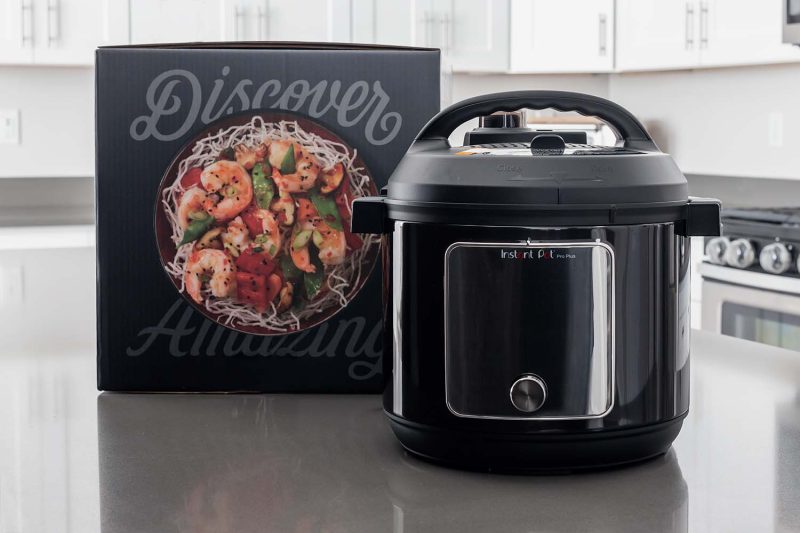
WHAT COMES WITH THE INSTANT POT PRO PLUS?
The Instant Pot Pro Plus comes with one red and one clear silicone ring, which we generally separate for savory and sweet meals.
It also comes with a low steam rack (aka trivet) with handles that can fold over flat.
It is also compatible with all standard Instant Pot accessories, including the Quick Cool Tray that came out for the original Duo Evo Plus.
⚠️ Interested in accessories? Check out my favorites in my Complete Instant Pot Accessories Guide.
WHAT DO THE INSTANT POT PRO PLUS ERROR CODES MEAN?
There are six basic types of error messages you may see on your Instant Pot Pro Plus. The online manual provides possible issues and solutions for each of the error codes.
WHY DID I GET A BURN NOTICE ON THE INSTANT POT PRO PLUS?
Since the Instant Pot Pro Plus cooks at 1200W, it runs a little hotter than its other 1000W models. 98% of the time, the difference in power doesn’t make a difference with the recipes.
On rare occasions, it’s enough to trigger the Burn Notice.
When the Instant Pot Pro Plus reads FOOD BURN, the first things to check are:
- Does the inner pot have enough liquid?
- Are any food deposits stuck to the bottom of the inner pot?
If you’ve gotten the burn notice,
- Remove the inner cooking pot from the base.
- Check for debris inside the pressure cooker housing or on the outside of the stainless steel cooking pot. (Keep in mind that the cooker will be hot, so you may need to let it cool to thoroughly check.)
- Then check the cooking pot.
- If just a little food has burned onto the bottom of the cooking pot, scoop the food into a separate bowl and scrape the burned parts away. Return the food to the cooking pot. At this point, you can add more liquid to the pressure cooking pot and try another pressure cooking cycle. Or you can transfer the pot to the stove or oven and stir while you finish cooking.
- If a lot of food has burned on, you’ll be able to taste the burnt taste throughout and, unfortunately, you may have to discard the meal. Soak and scrub off the burned foods. Barkeepers friend is a useful cleaner to help remove stubborn stains.
In the future, be sure to add more liquid to the pot and avoid ingredients containing thickeners like canned soups or prepackaged spaghetti sauces.
⚠️ For lots more details, check out our in-depth discussion on the Instant Pot Burn Notice: What to Do and How to Avoid It in the Future.
OTHER INSTANT POT PRO PLUS ERROR CODES
Lid indicates that the lid is not correctly positioned. Simply open the lid and replace it, ensuring it is properly placed.
PrSE indicates that pressure has accumulated during a non-pressure cooking program. You will want to use the quick release vent to reduce pressure in the pot.
Alt means that the temperature for safe canning was not reached. Check the seal is correctly in place and that there’s water in the pot.
The remaining error codes are quite rare:
C1, C3, C4, C6: These errors don’t specify what exactly is wrong, just that your Instant Pot may have a faulty sensor and that you’ll need to contact customer support at 1-800-828-7280 or support @ instantpot.com.
C7 indicates that the heat element has failed, there is not enough liquid, or the quick release switch is set to vent position. If you get the error after checking the vent release valve and checking to make sure there is the minimum amount of liquid required for pressure, you would need to contact Customer Support.
C8 indicates that you have placed the wrong inner pot in the housing. (This is useful if you have an older model of Instant Pot with the domed bottom pan.) The pots are not interchangeable.
C10 indicates there’s a WiFi error. If you keep getting this error, you’ll need to contact customer service.


This is frustrating. I cannot find ANYwhere that says this Pro Plus has an Altitude setting/adjustment.
Also the website says 1500 watts but you state 1100. Which is it?
I’ve been trying to find these answers for days – including asking Instant pot and it’s weird no one talks about Altitude setting or wattages.
Hi Lisa – You could reduce the cook times in recipes slightly for the higher wattage, but I haven’t found it makes much difference. I also was not impressed with automatic altitude adjustments. That feature was on the Instant Pot Ultra, but it only adjusts the cook time for altitude for the preset functions. Since I rarely use the preset functions, it isn’t helpful for me. The technical rule is to add 5 percent more cook time at 3,000 feet above sea level, 10 percent for 4,000 feet above sea level, and so on, increasing by 5 percent every additional 1,000 feet. You can read about the altitude adjustment here https://www.pressurecookingtoday.com/instant-pot-ultra-60-review-giveaway/
Instant Pot website states this is 1500 watts. ????
I saw a review on the instant pot Max from Rosered Homestead. This lady is a professor and does extensive testing. She tested the Instant Pot Max for canning and the temperature inside the jars did reach the kill zone for botulism for the appropriate time. I’m hoping and assuming since the Pro Plus is a newer model that it will do the same! Pray that I don’t kill myself or my family when I can in mine! I agree with the guy above, no review videos on this model except the weird guy drinking milk who wasn’t helpful at all.
Hi Donna – I believe she’s tested the IP Pro Plus and it met her criteria too. I have a video that’s being edited and we hope to post it soon. Thanks! Good luck with the canning.
I have not seen a single review for the Pro Plus on YouTube. Not one! Just some NUT JOB drinking milk out of a glass BOOT freaking out over the unboxing of it. He didn’t use or review it. Probably TOO FREAKED OUT from drinking all that milk from a GLASS BOOT!
OK, CHOP CHOP, Start posting people.
p.s. have a nice day.
Hi Michael – we have it on the schedule to film a How To use it on November 20.
It’s January 2022, I don’t see a followup on the instant Pot Pro Plus. I can very interested in it’s canning capabilities and safety. Any follow ups on it?
Hi Lori – we’re hoping to have the review up within the next week or so. We’re also posting a YouTube video at the same time. Thanks for asking!
This should not be promoted as a canner. There is no tested evidence the the current processing times are sufficient for pots under 16 quarts. Smaller pots pressurize and depressurize more quickly than the bigger pots. Both of these times are part of the tested times for pressure canning so shortening them is resulting in under processed foods. It is very disappointing that Instant Pot continues to offer this feature without independent testing to prove the safety
People are independently testing with great results.
Thanks for this great review.
I have the Pro and I will stick with it and use my old Fagor for canning. Also, like you, I’m often enough in the kitchen not to need the App.
I really appreciate you adding the colored Pros & Cons.
Regarding the burn notice, I only had one with my Duo + and have never had one with the Pro.
Thanks! We really appreciate the feedback.